So it happened. I had a drive fail on me. Degrading my RAID 6 media server. Luckily I was notified by mdadm and was able to order a new one from newegg.com and rebuild it.
I want to walk through the steps I took getting my RAID file system backup and running, starting with the notification I received to my gmail account (which i received on my phone).
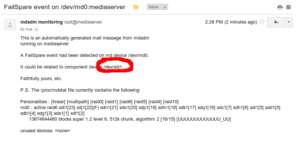
-
- Screen shot of email regarding the drive failure.
- At home, I could see on the chassis the error light indicator on the drive bay with the failed Hard Disk. Luckly I had RAID 6 which allowed the RAID 1 more disk of fault tolerance.
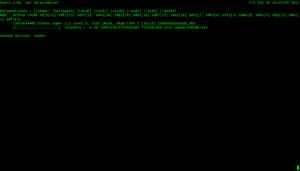
- On the server command line, I needed to inform mdadm that I was removing the drive from the array. So first make sure the logical disk representing the array is unmounted. In my case /dev/md0.
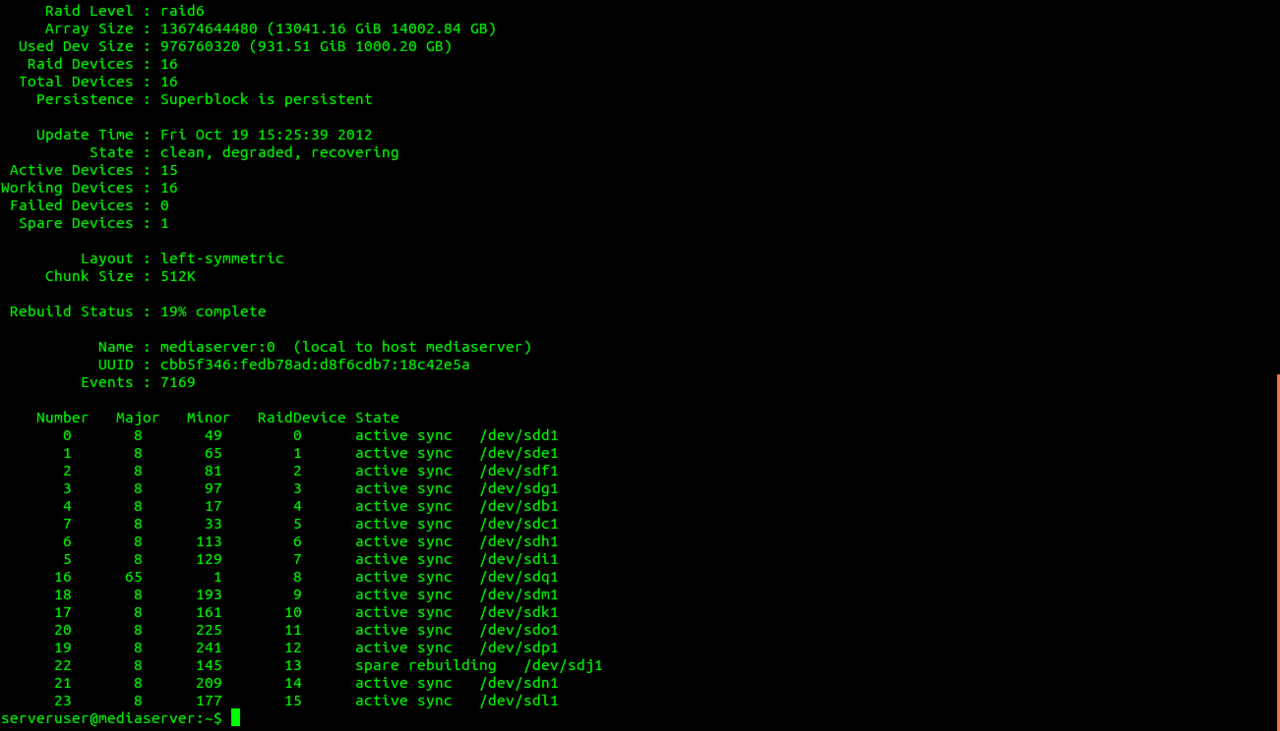
- Check which drive has failed.
mdadm --detail /dev/md0
As you can see from the screenshot above, mdadm is aware of the drive failure and which drive has failed. Also notice the State: information. Clean, Degraded. Which is a good thing, cause if not it would mean the RAID is not recoverable. - Next we have to remove the drive from mdadm’s knowledge.
mdadm --manage /dev/md0 --remove /dev/sdj1
If you rerun the command at step 4, you should no longer see /dev/sdj1 in mdadm scope.
- Put the new drive in, and prepare it.
Delete any partitions that may be on the new drive and create 1 primary partition that takes up all the blocks on the disk. Lastly set it to linux raid filesystem type.fdisk /dev/sdj ...................................... Command (m for help):n Command action e extended p primary partition (1-4) Partition p Partition number (1-4): 1 First cylinder (1-182401, default 1): [blank] Last cylinder or +size or +sizeM or +sizeK (1-182401, default 182401): [blank] Command (m for help): t Hex code (type L to list codes): fd Changed system type of partition 1 to fd (Linux raid auto) Command (m for help): w The partition table has been altered! Calling ioctl() to re-read partition table. Syncing disks.
- Now before we add the drive back and begin the recovery process, let’s increase our raid drive I/O speed, as according to zackreed.
echo 50000 > /proc/sys/dev/raid/speed_limit_min
echo 200000 > /proc/sys/dev/raid/speed_limit_max
Effectively what we are doing is we are increasing the throttling mdadm can use to transfer blocks in the RAID. This is limited to the transfer speed of your Hard Disk device regardless of what you set the minimum to. Therefore, in my case the Hard Disks are SATA-II and get average 45MB/s (guessing, haven’t done a speed test in awhile). Our first statement sets 50000 bytes to the speed_limit_min throttle, this is well above the drive’s speed limitation, so don’t be alarmed in the next step when the transfer speed doesn’t show exactly 50MB/s when rebuilding the RAID array.
- /dev/sdj1 should now be available and prepared to use with the RAID array. Add it to the array.
mdadm --manage /dev/md0 --add /dev/sdj1
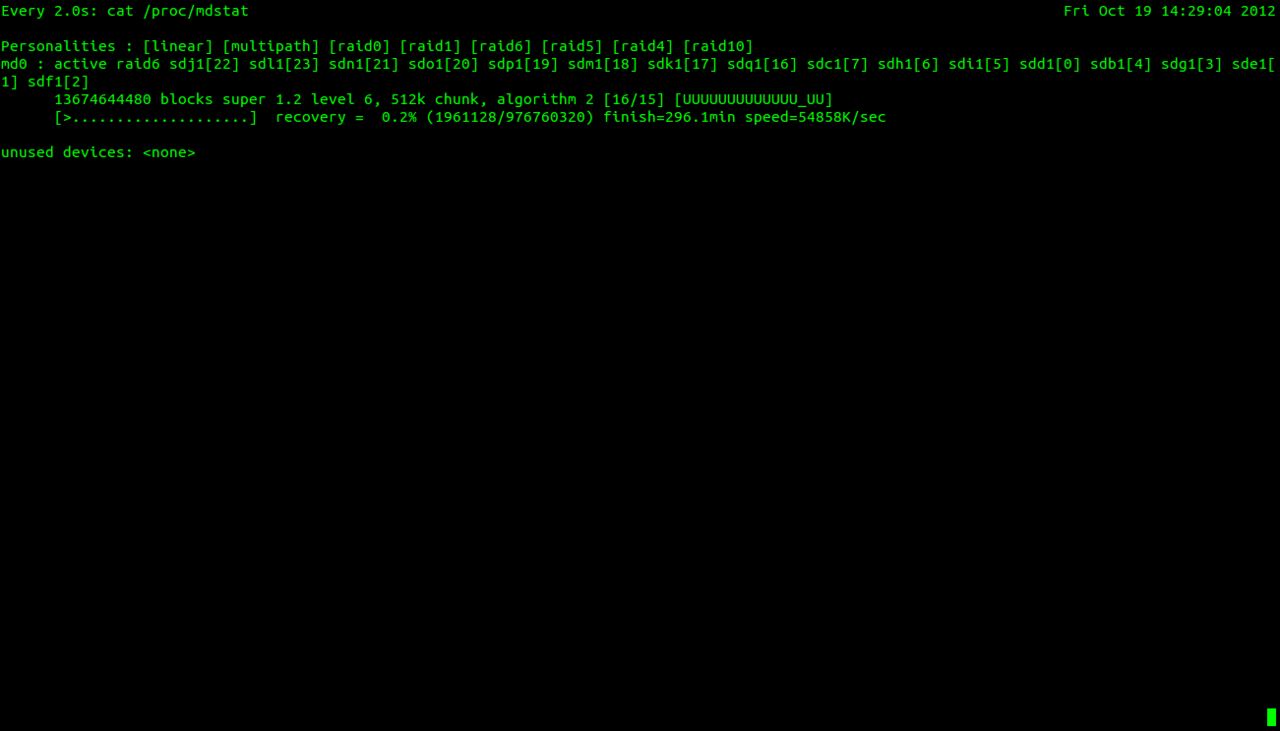
Now you can watch the progress.
watch cat /proc/mdstat
Also, if you rerun the mdadm –detail /dev/md0command you see that it is reporting rebuilding the drive.
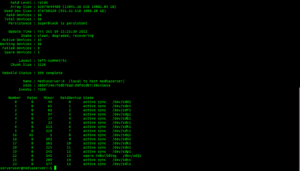
- After a few hours, the watch cat /proc/mdstat stated that the recovery was no longer going on. Check mdadm details.
mdadm --detail /dev/md0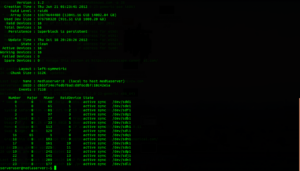
- Lastly remount te drive and do a fsck check on it, for mine th array is in ext4 so,
fsck.ext4 -f /dev/md0
This will do an consistency check on the file-system and should come back clean.
umount /dev/md0
That’s it! Recovered from a drive failure and all my data on the RAID array is intact.
Sources:
- Screen shot of email regarding the drive failure.