So it finally happened. The Batteries in my APC SUA3000RM2U finally went bad. I’ve had them for over 5 years so I am happy with there life. I’ve had to replace UPS Battery Cartridges and Packs before when working as a Data Center consultant. It is usually a simple and straight forward task. I would RMA the Battery Cartridge or Pack, if it’s under warranty, and then the manufacturer would send me back a new Battery Cartridge or Pack already filled with new batteries. Hot swap it with the old one and you are done.
However, this time it was my home unit and I don’t have warranty coverage or the extended one(usually purchased by an enterprise). So I went online looking for a Battery Cartridge replacement, $300-400!!!, o my! So I decided to try and replace the batteries themselves rather than the entire Battery Cartridge. I was able to find a pack of 8 batteries for around $83 with free expedite shipping. The following steps were what I did to replace each APC RBC43 battery inside the battery cartridge.
-
-
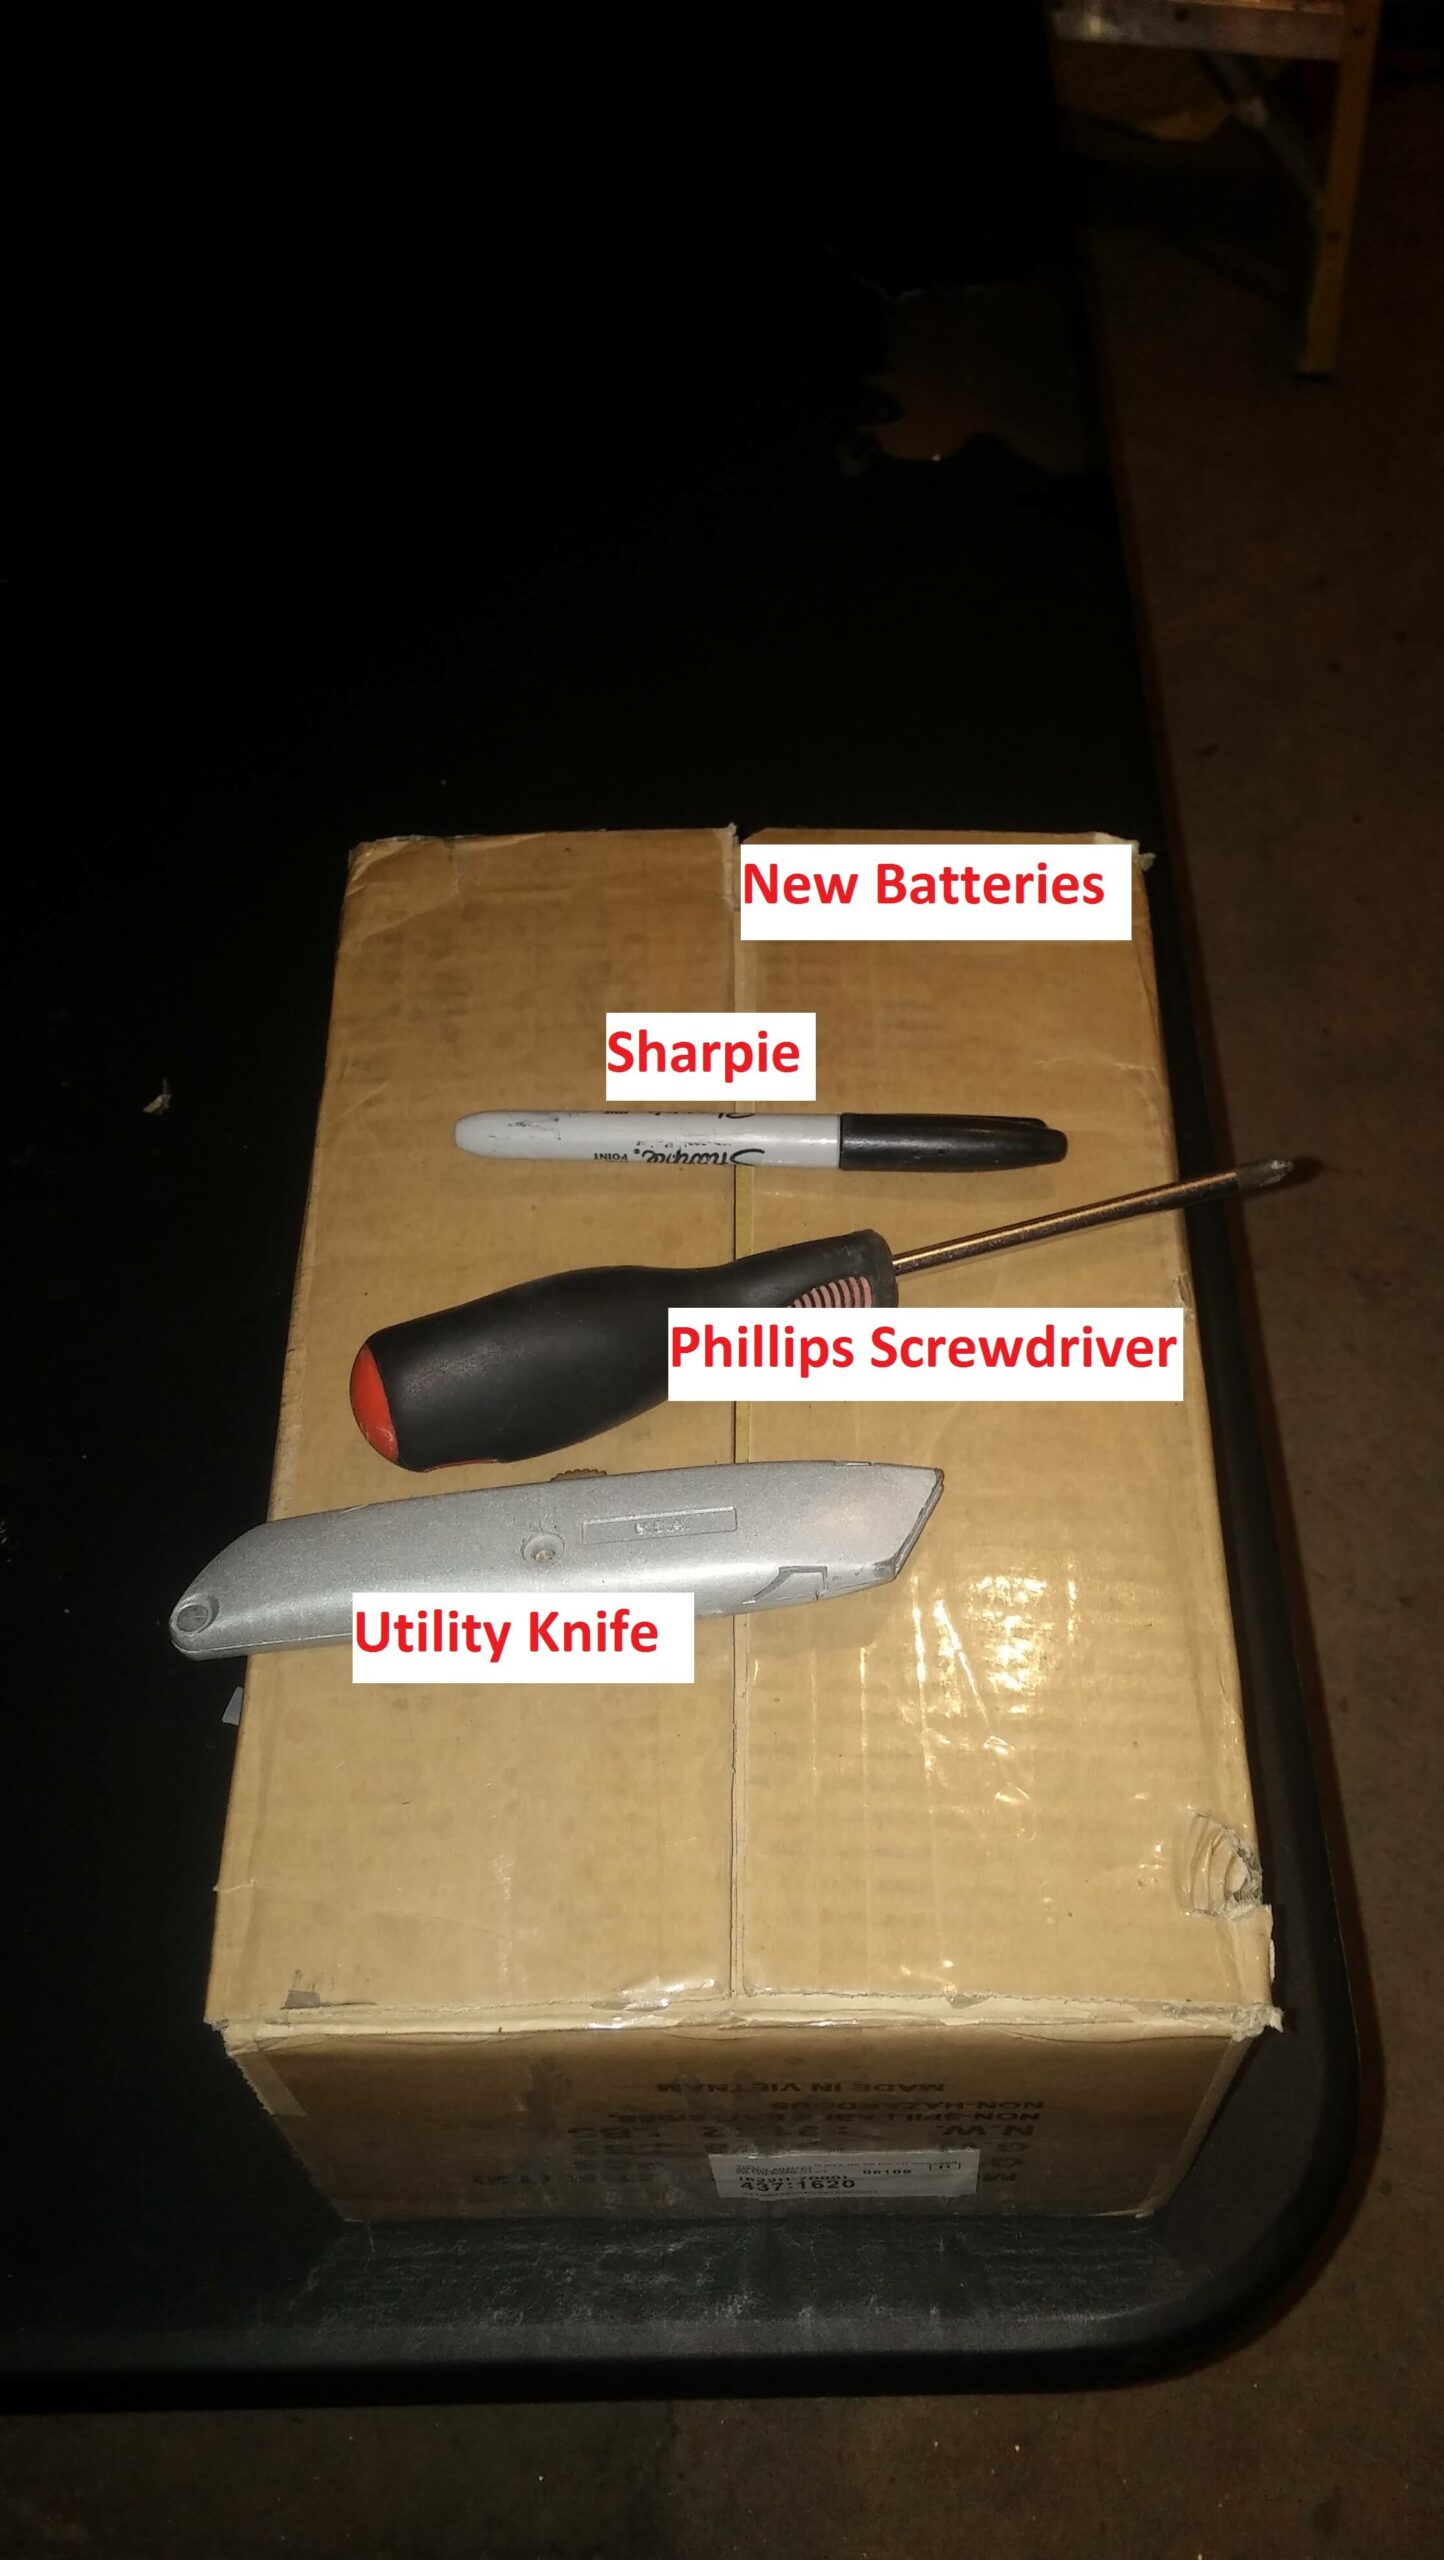
Tools needed, New Batteries, Sharpie, Phillips Screwdriver, Utility knife(was in picture for cutting the new box of batteries open only, haha).

-
-
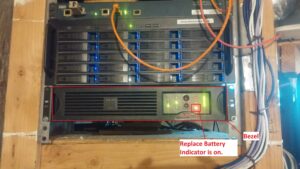
Identified the “Replace Battery Indicator” is red, and proceed to remove the APC units bezel
-
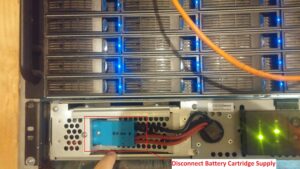
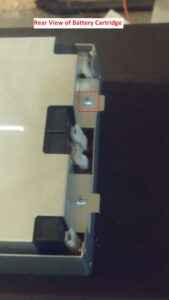
Disconnect the Battery Cartridge Power Supply Connector from the main APC unit. The unit will begin to beep and the Replace Battery indicator will being to flash continuously.
-
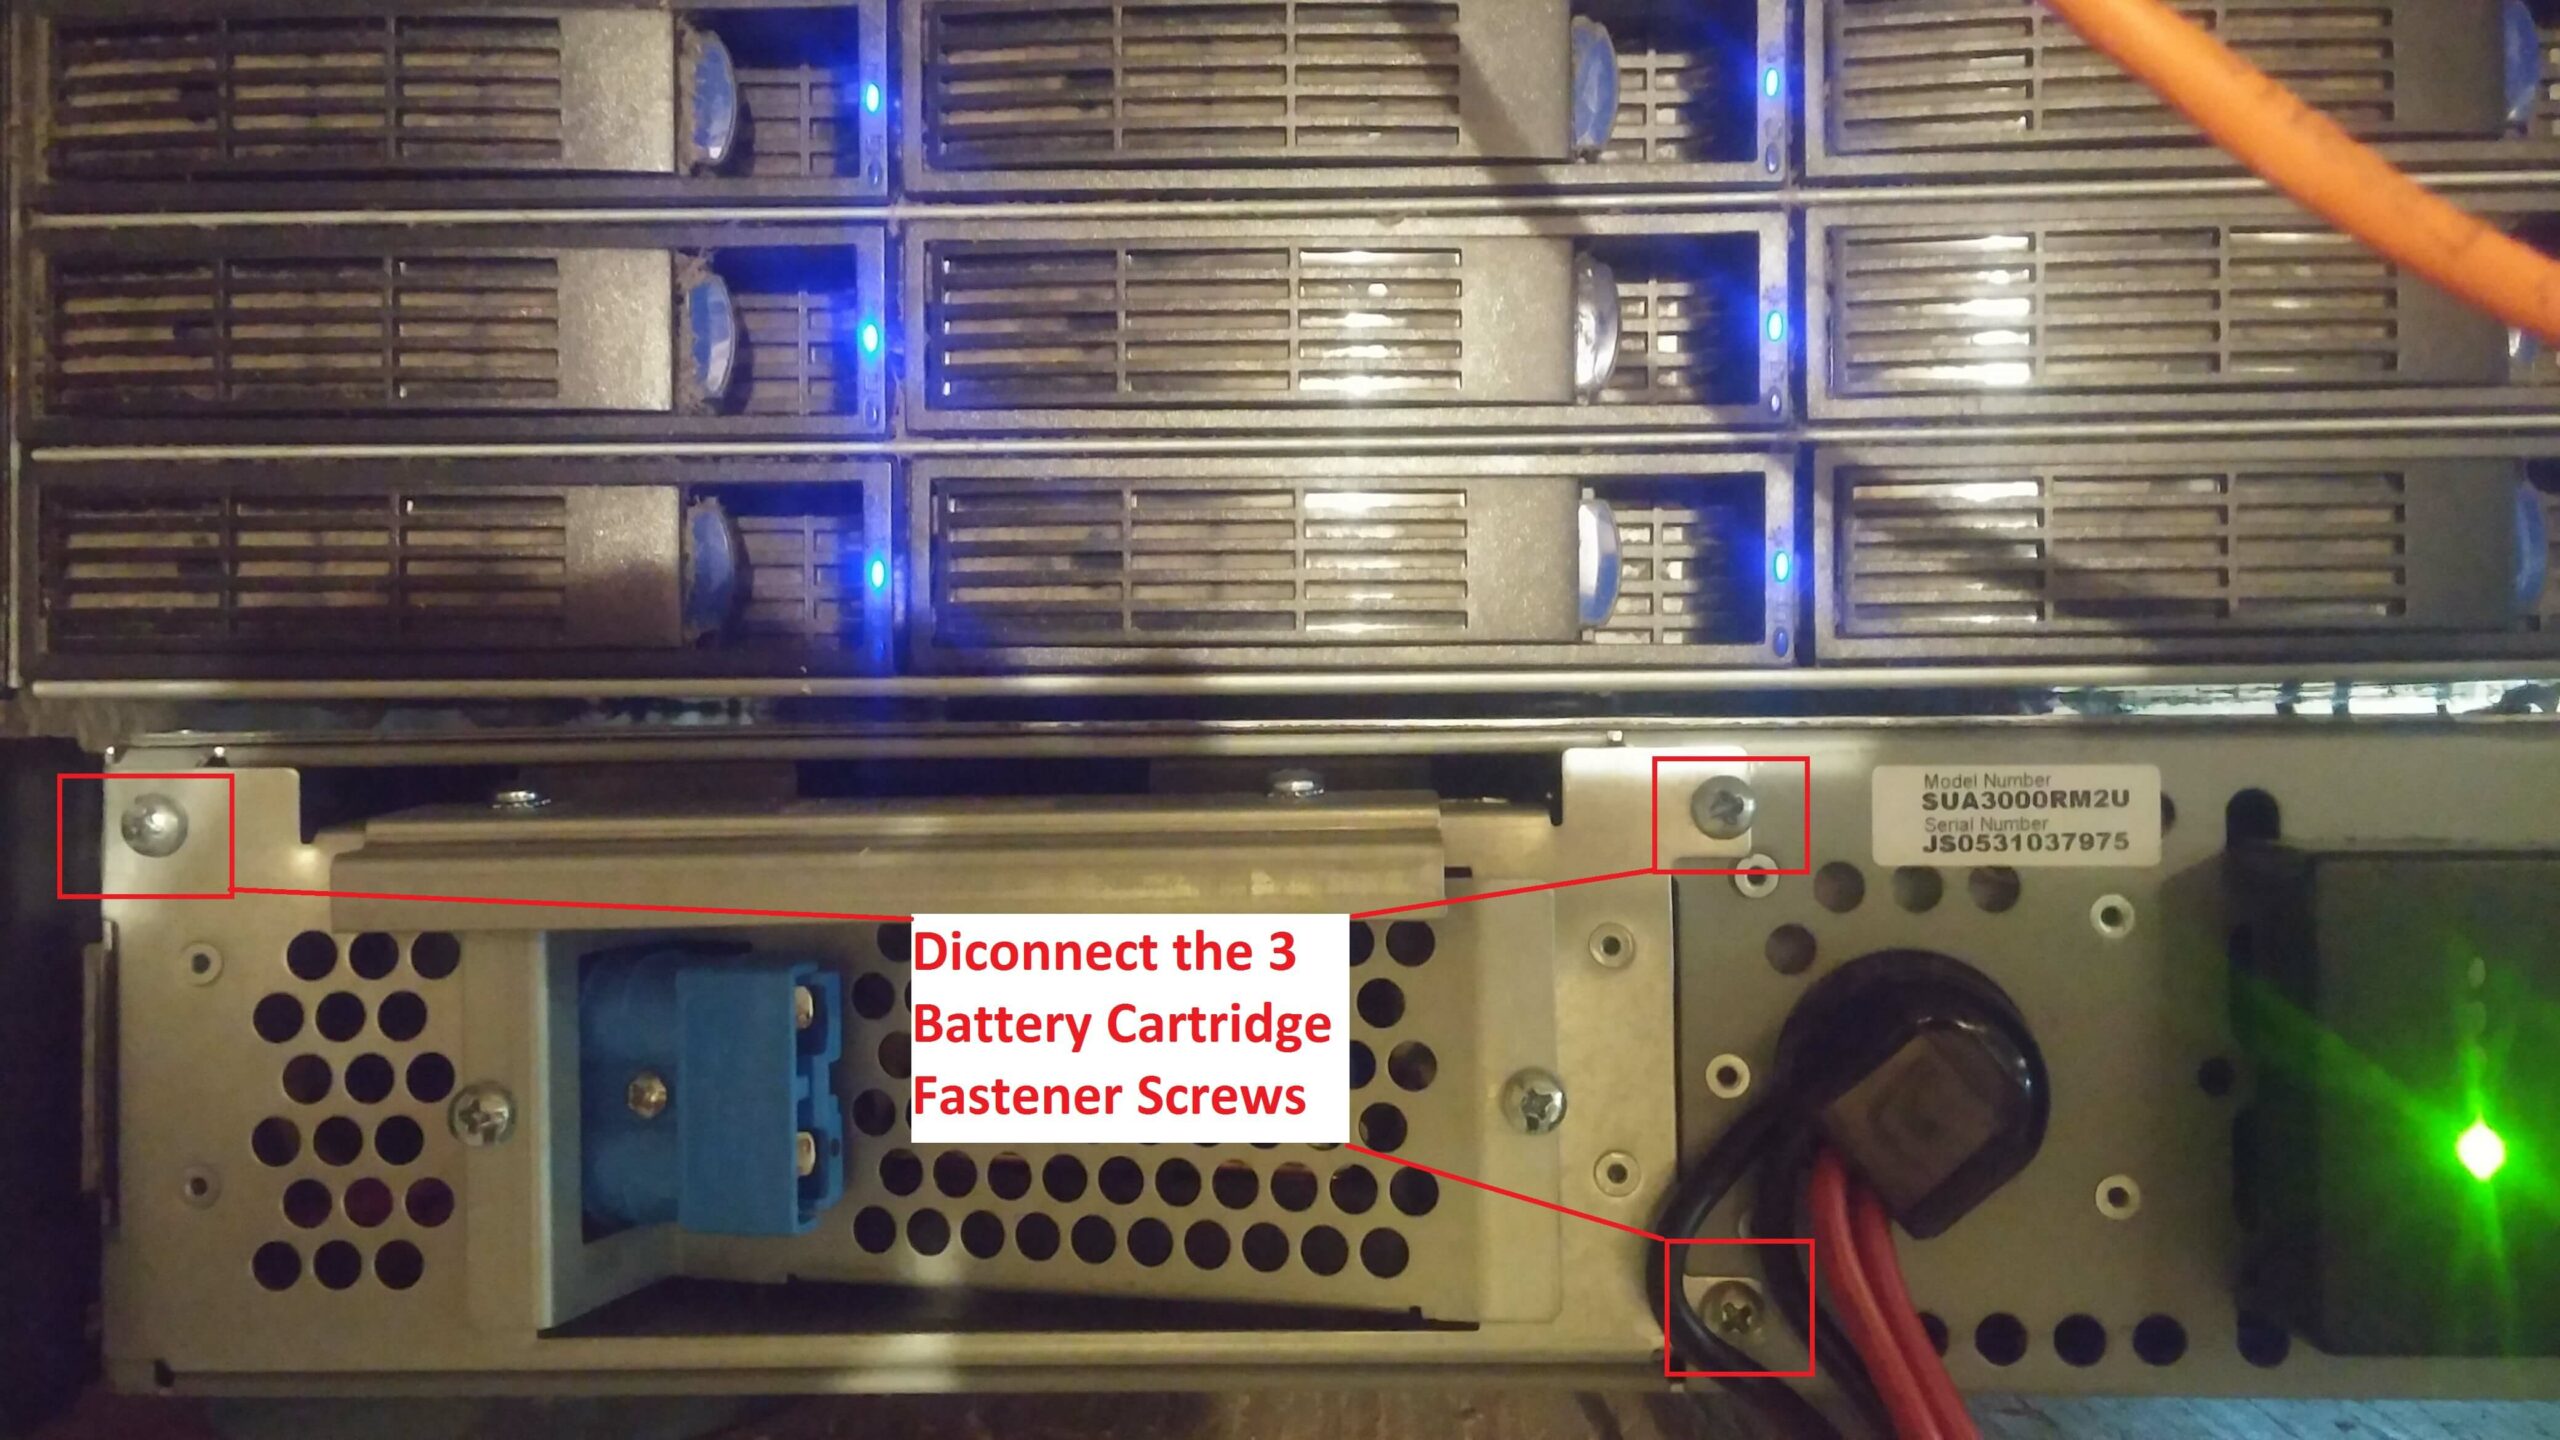
Locate the 3 Battery Cartridge fastener screws and remove them.

-
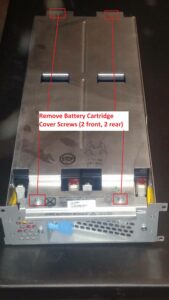
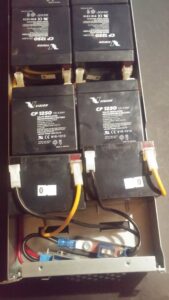
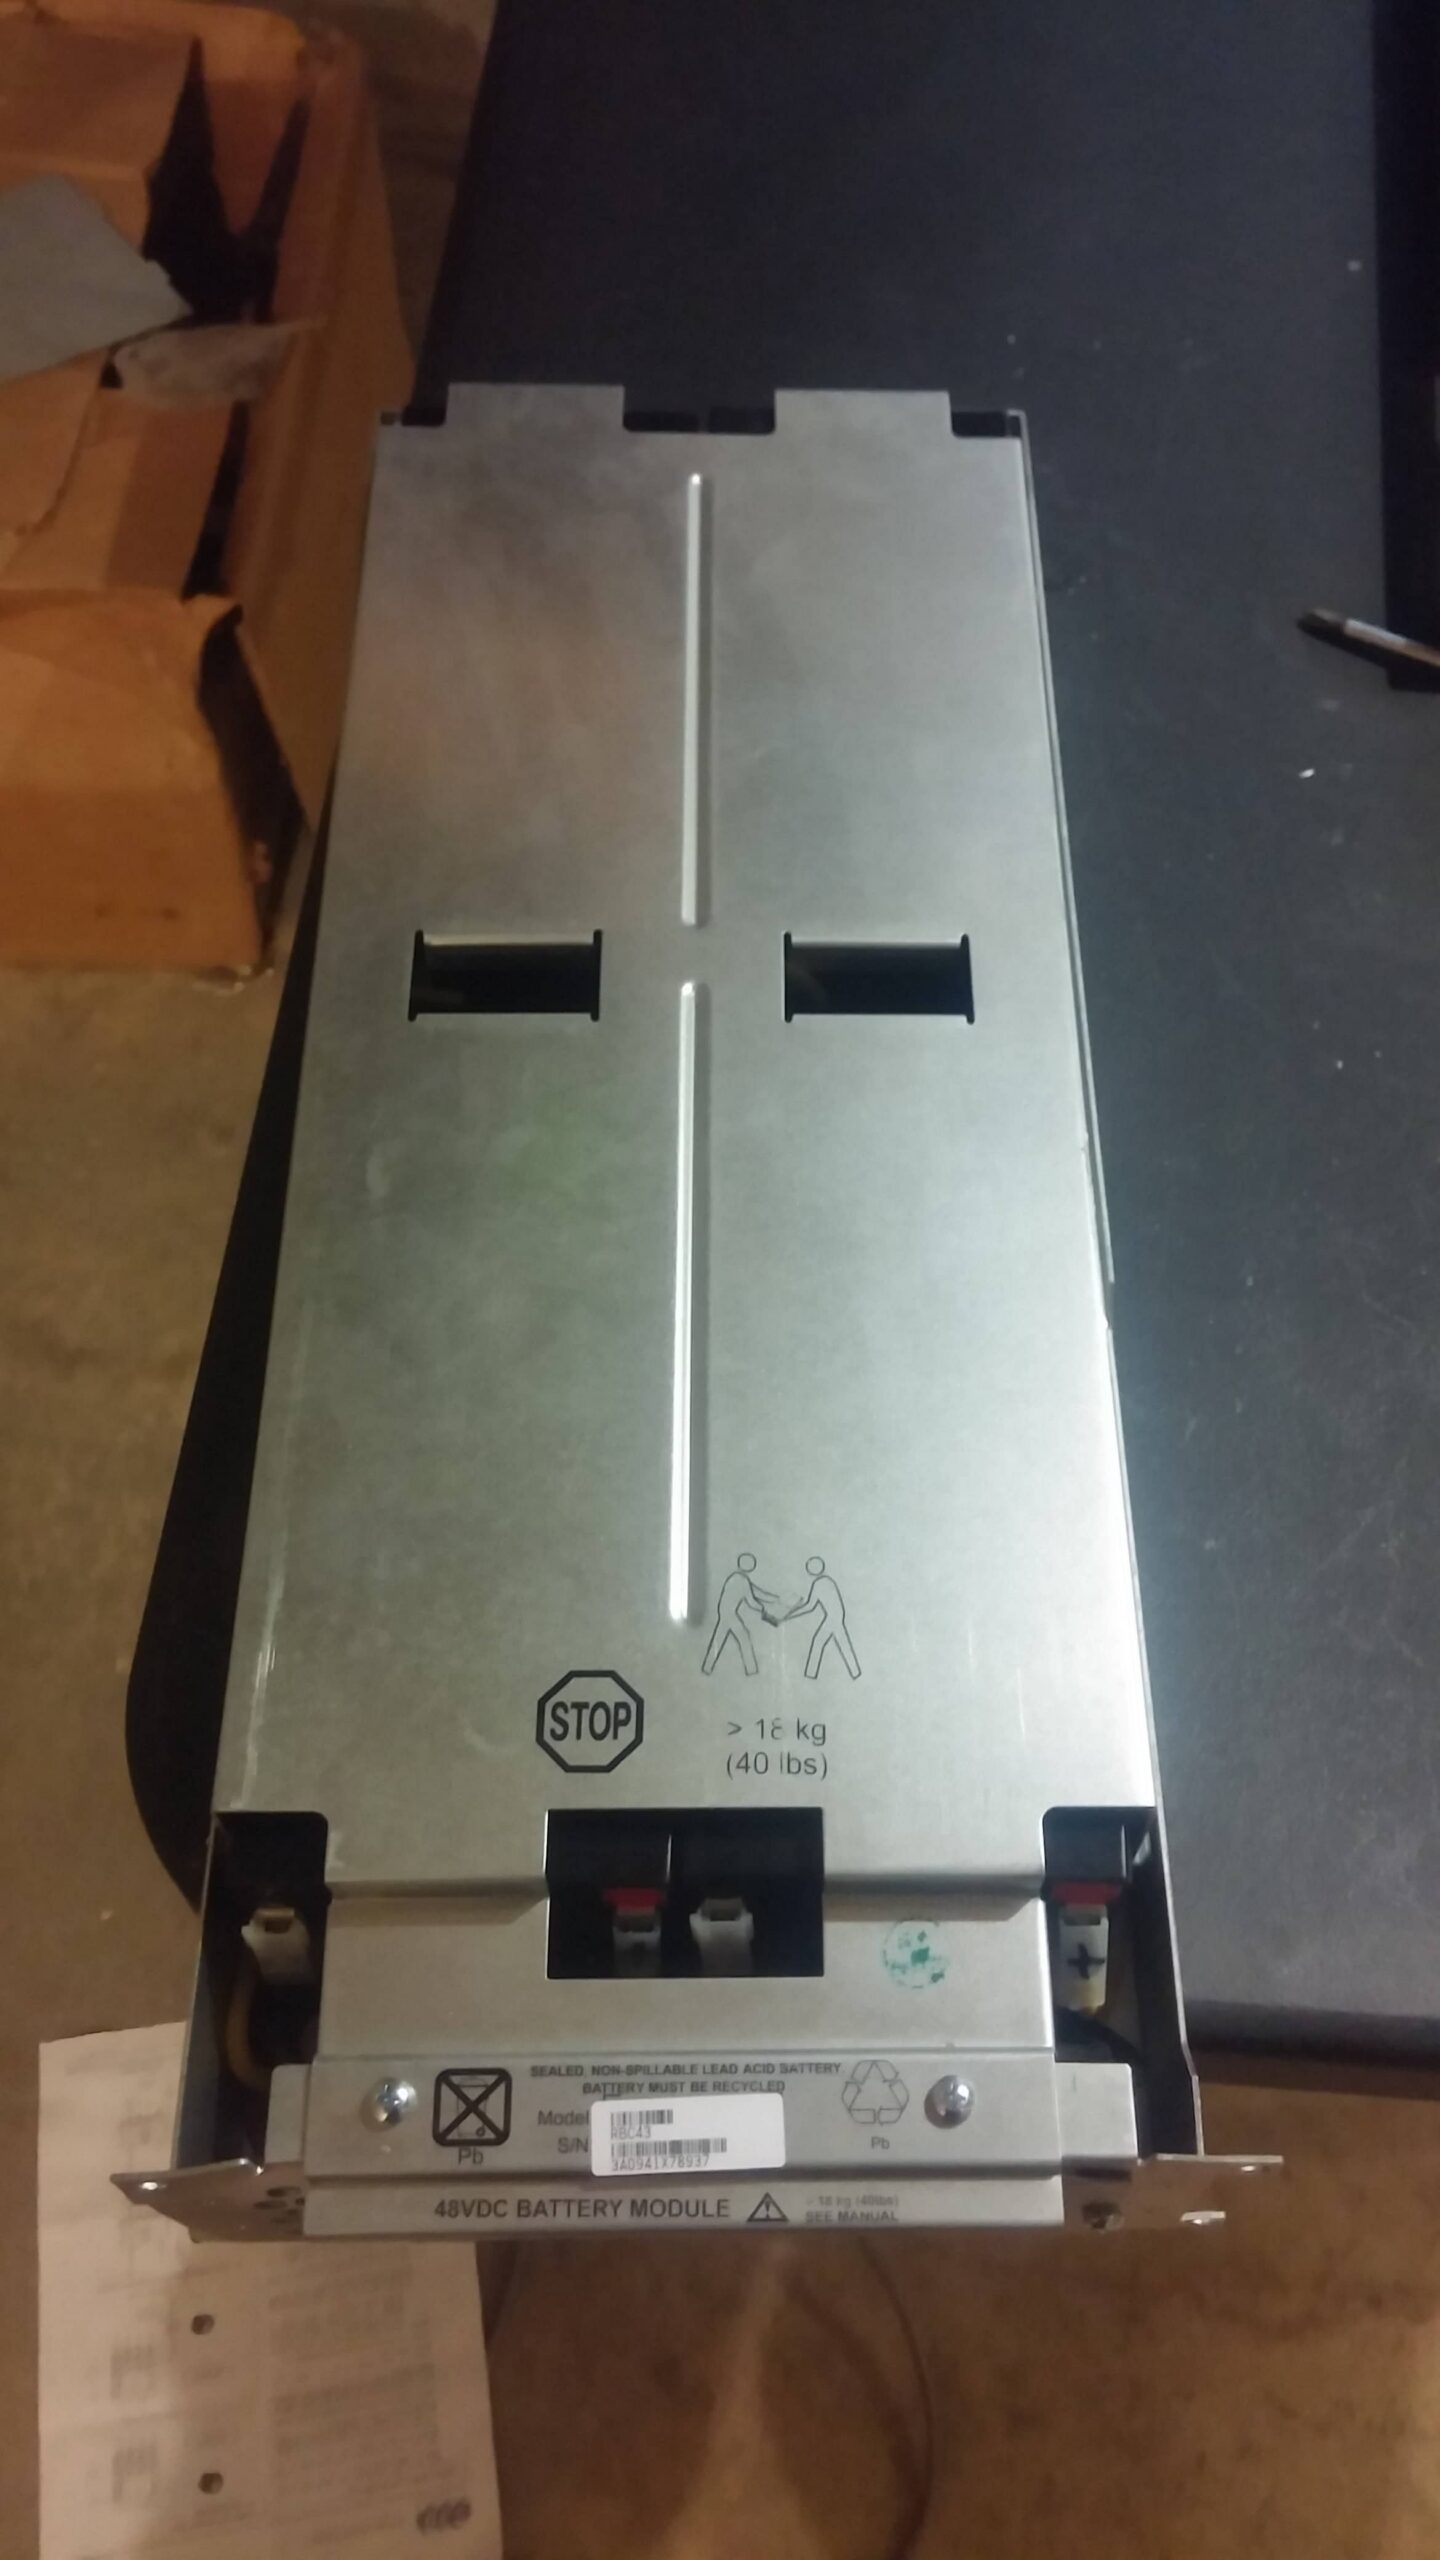
Remove the Battery Cartridge and set it down on a table, careful!! it weighs 40 lbs!! Remove the 4 screws holding the top plate on the Battery Cartridge.
-
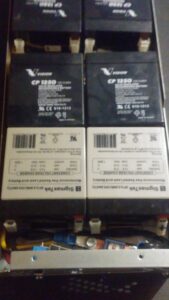
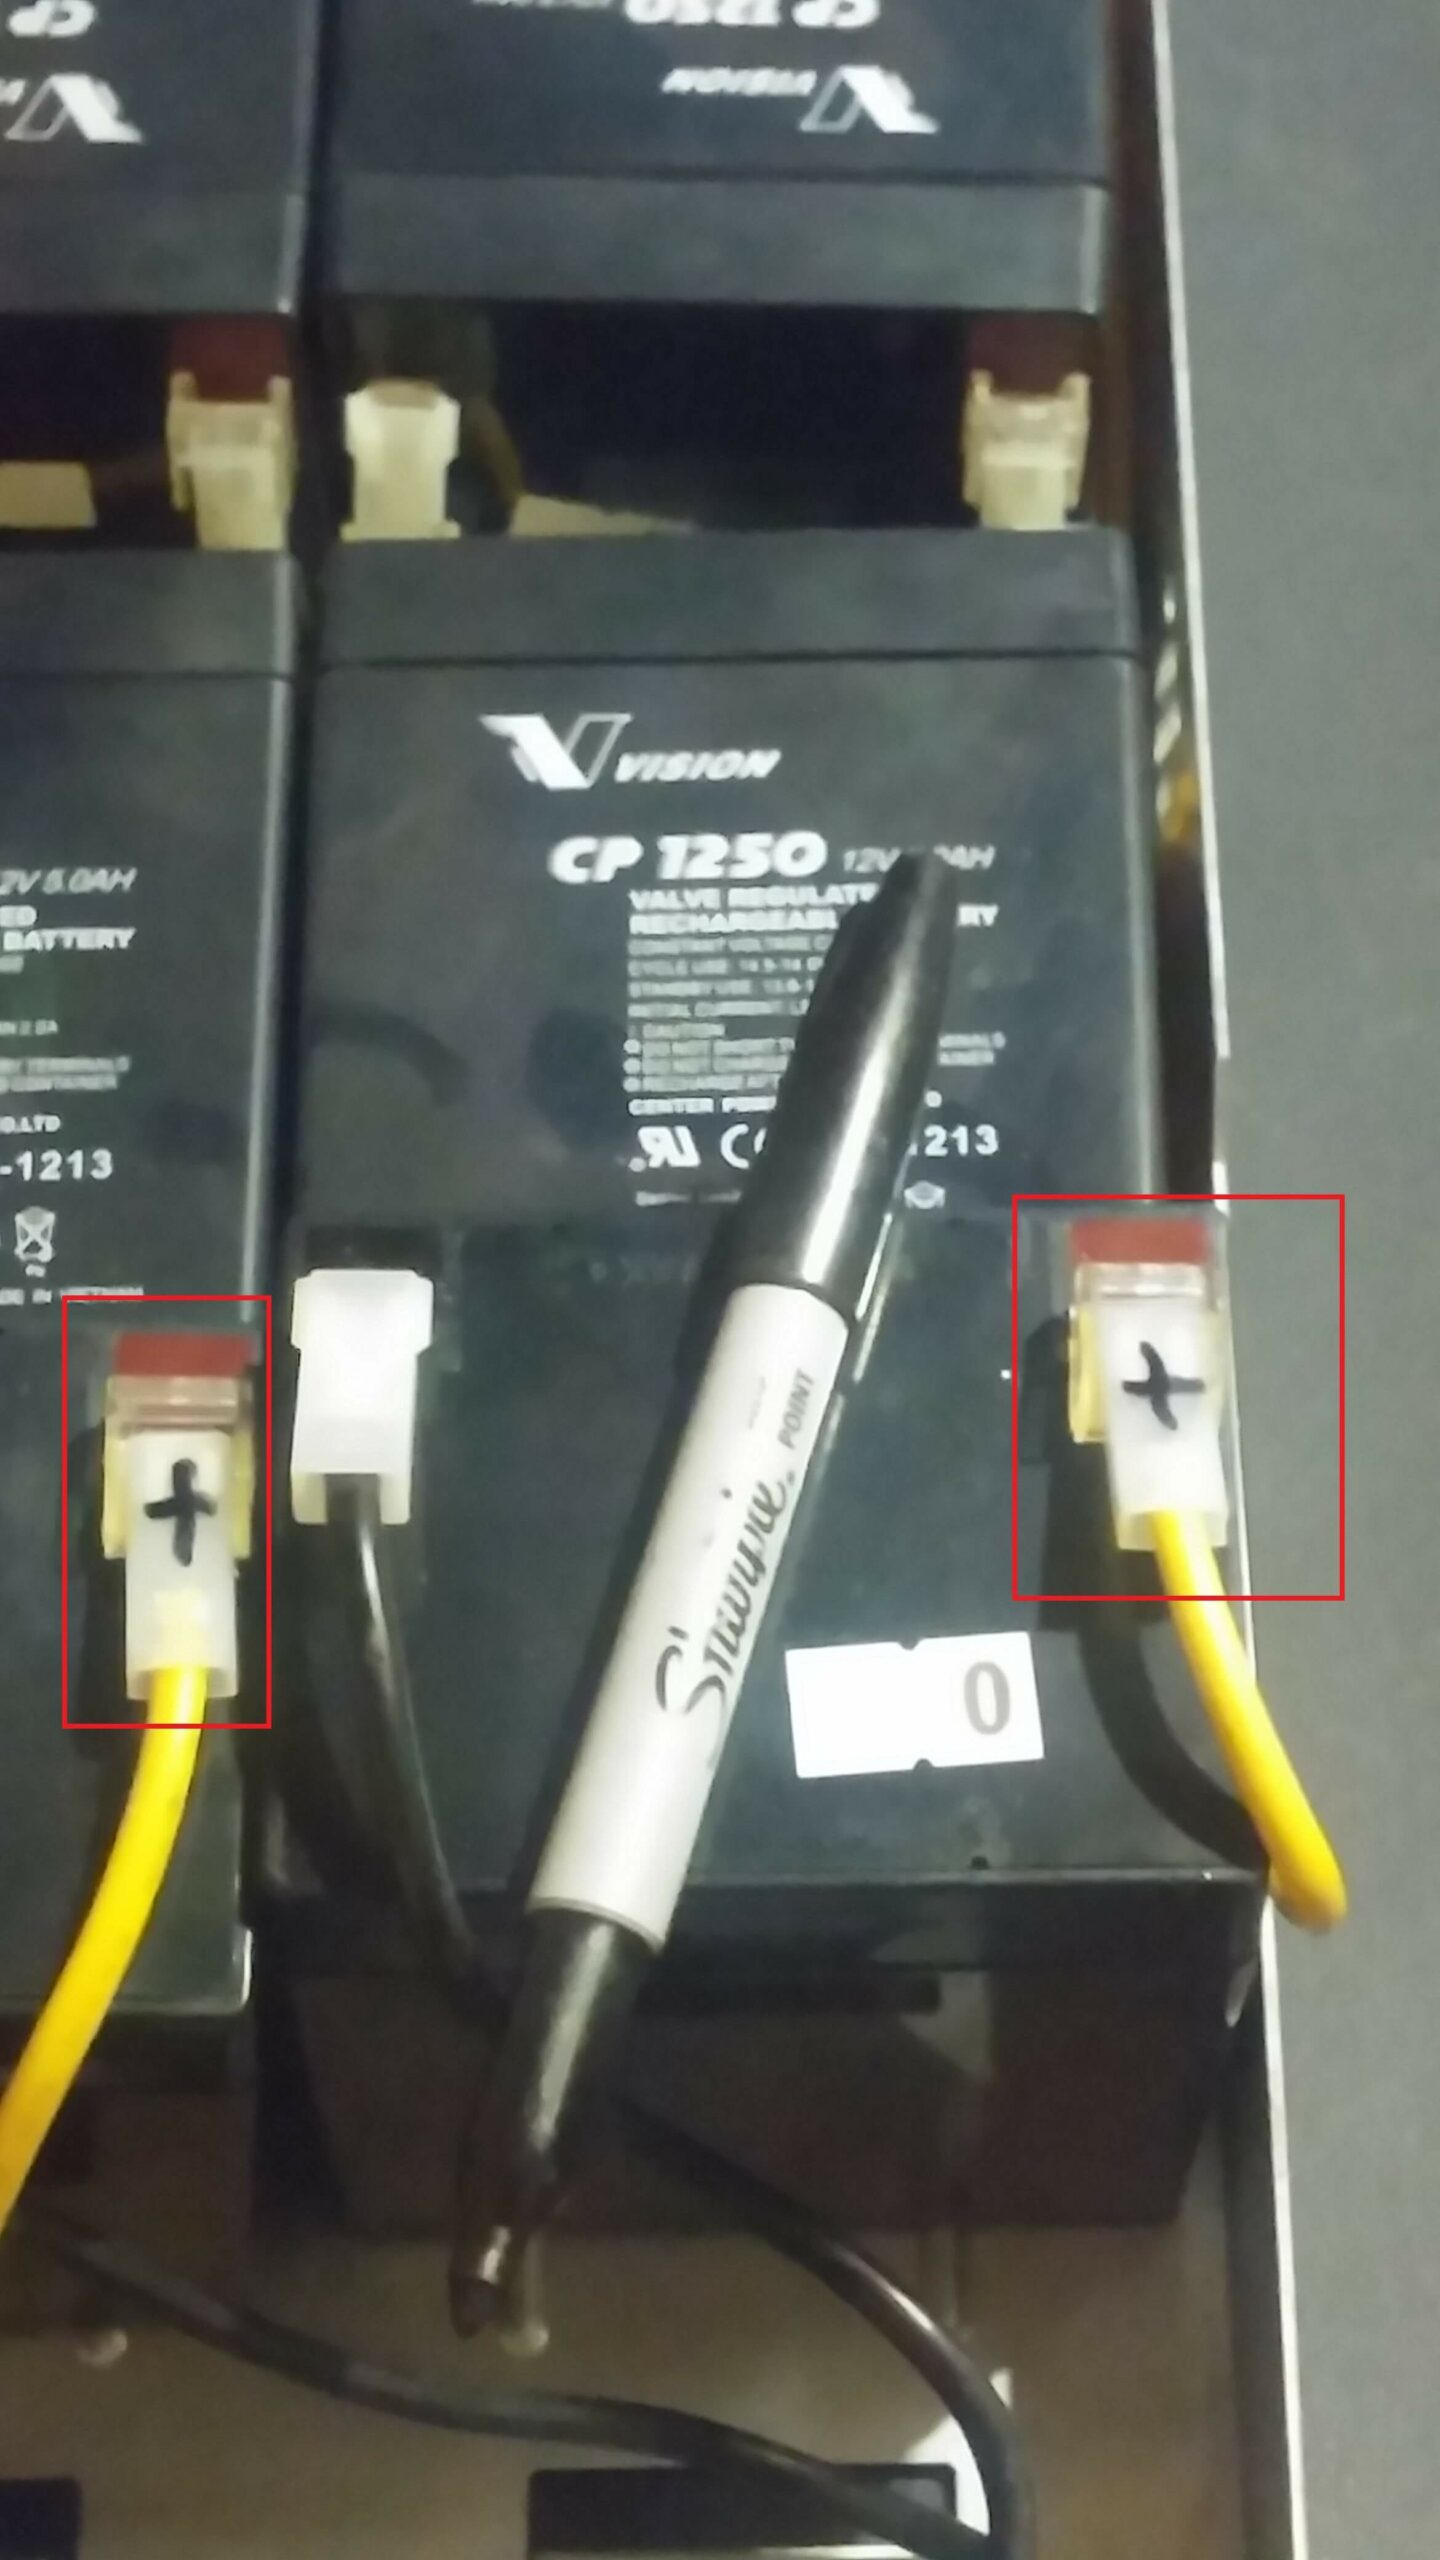
Rotate the first row of batteries(2ea) to expose their terminals.
-
Mark each Positive lead with a Sharpie to keep track of the cabling

-
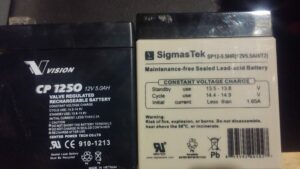
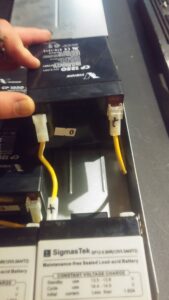
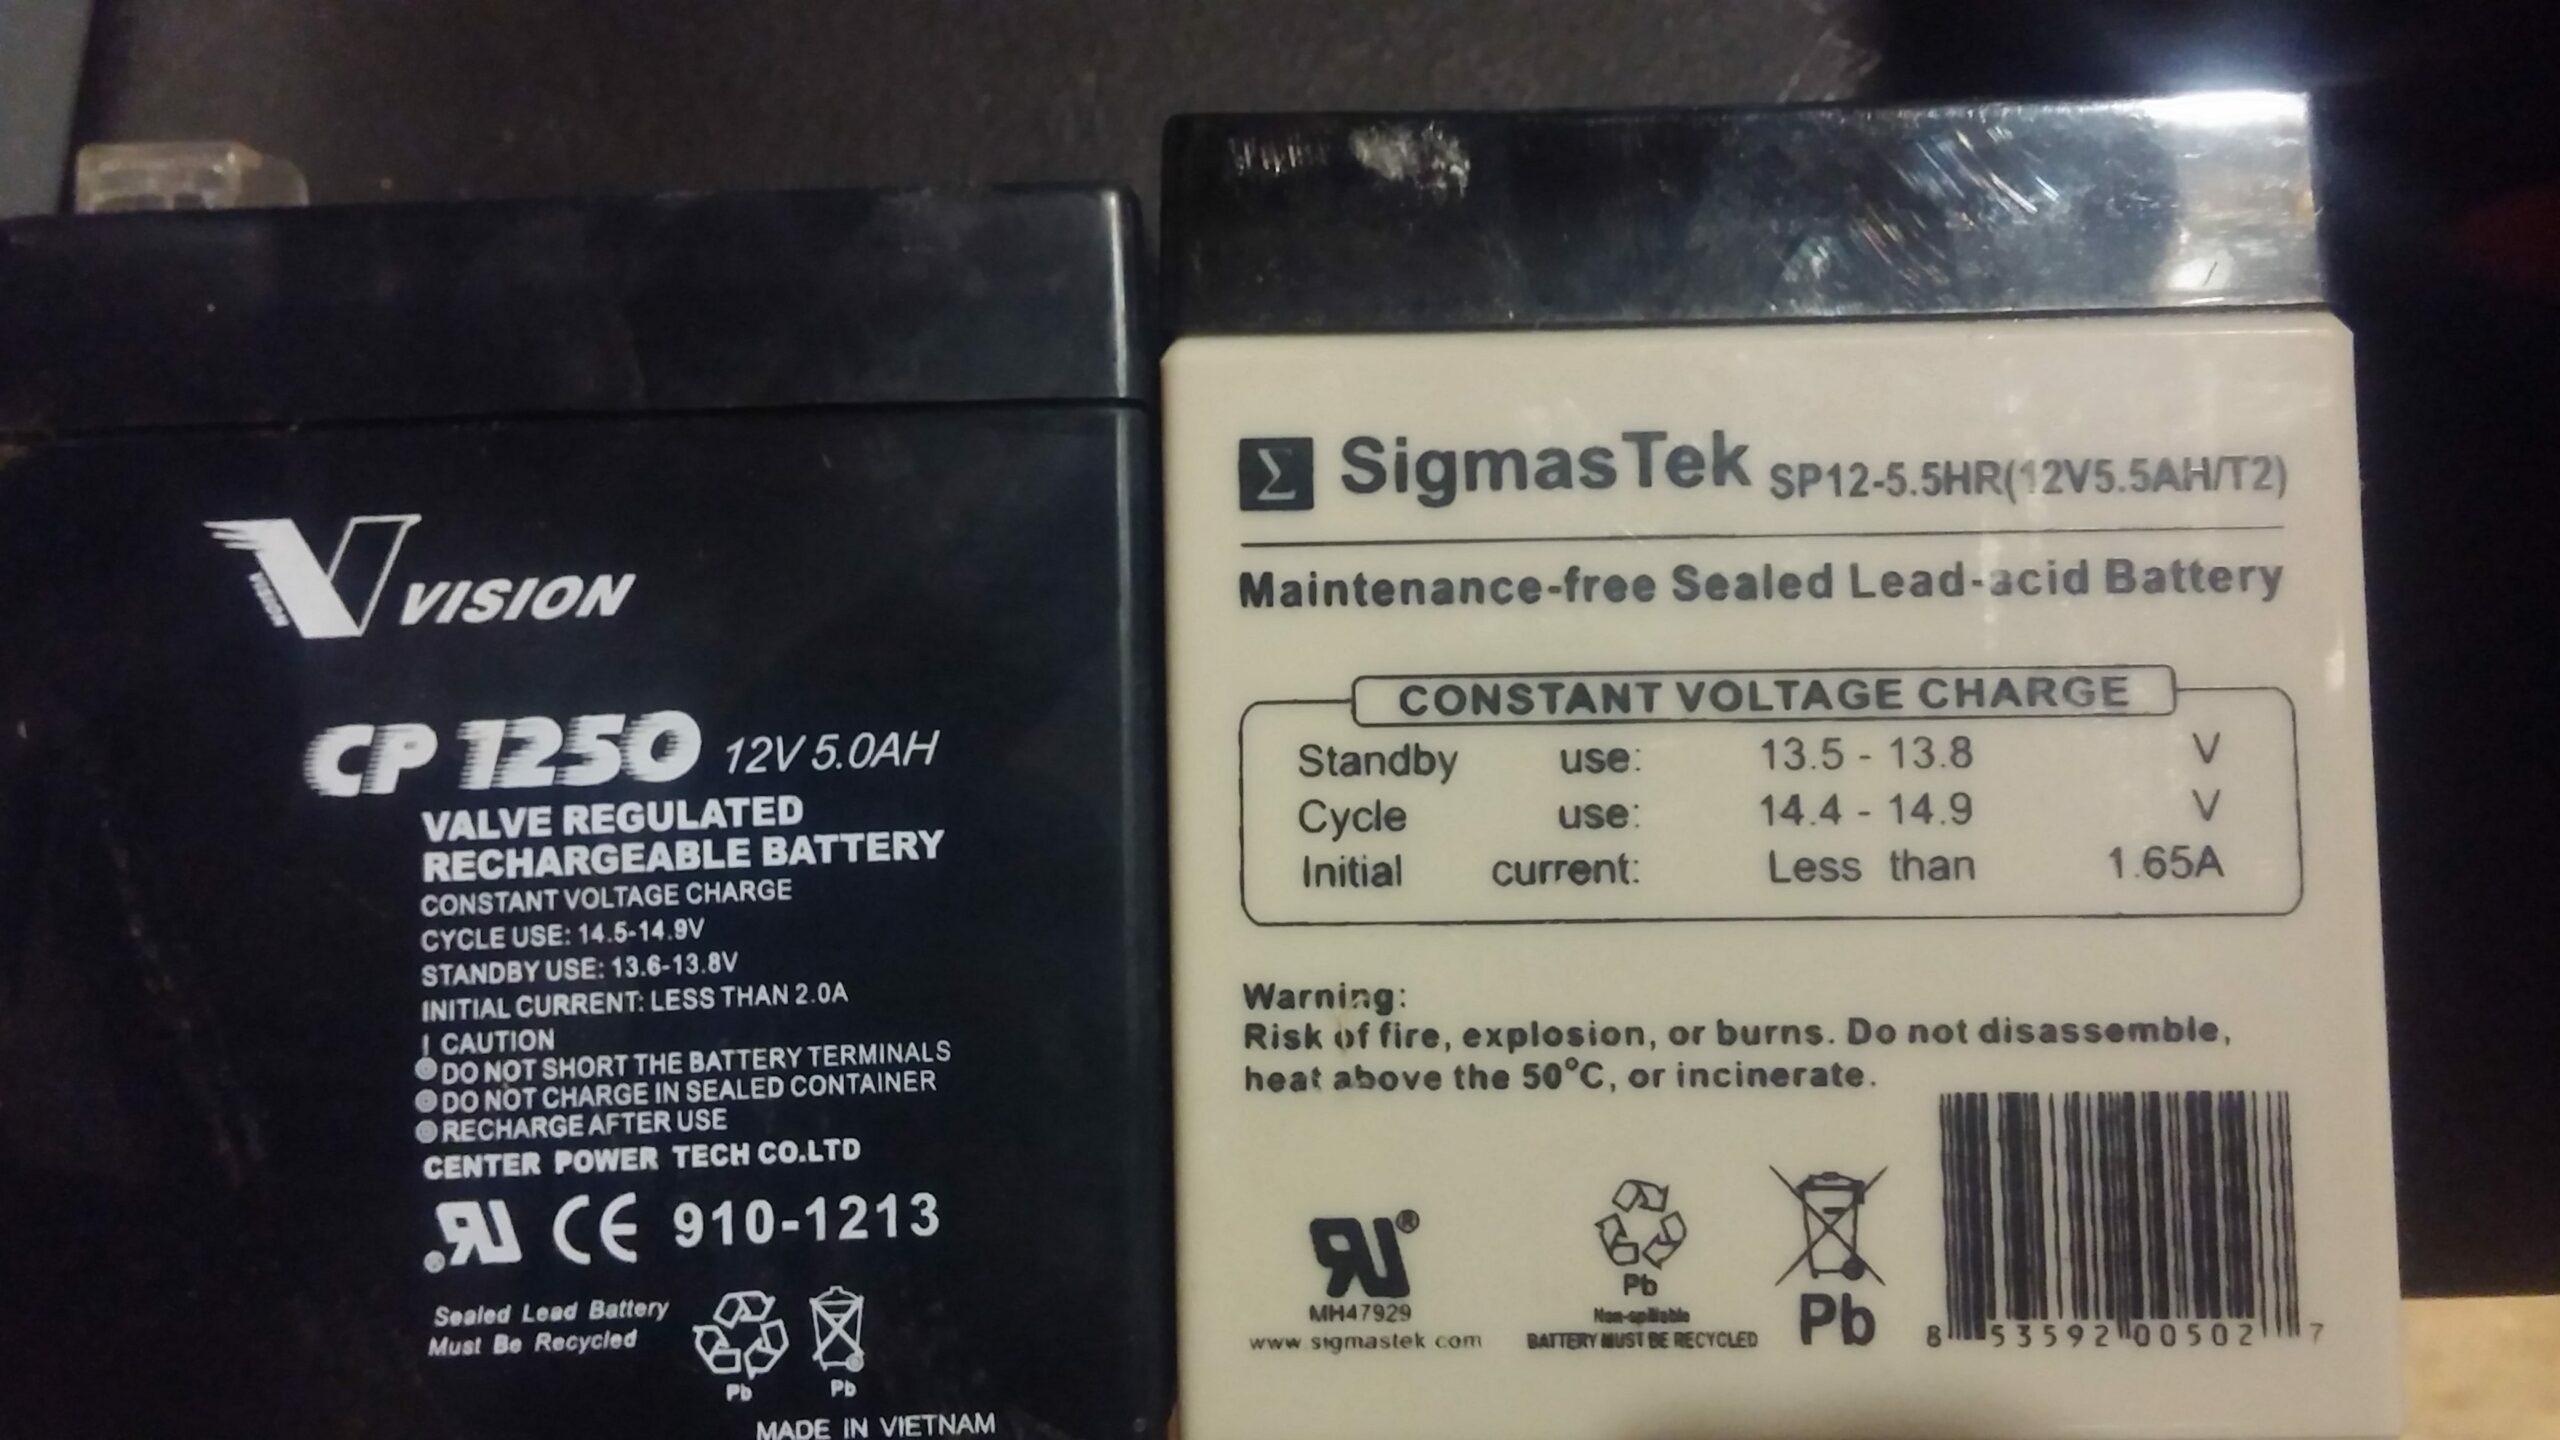
Remove one battery to compare the old battery with the new. Double check their specifications match and you received the correct replacement ones.
-
Replace each of the two(2) batteries in the first row with the new batteries. Do one row at a time!!
-
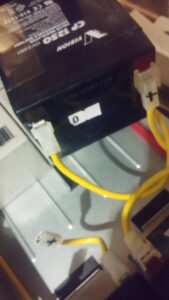
Reset the batteries carefully, there are metal notches to keep them from moving too freely, and make sure you tuck in the the wires so the battery is flush on the metal surface.
-
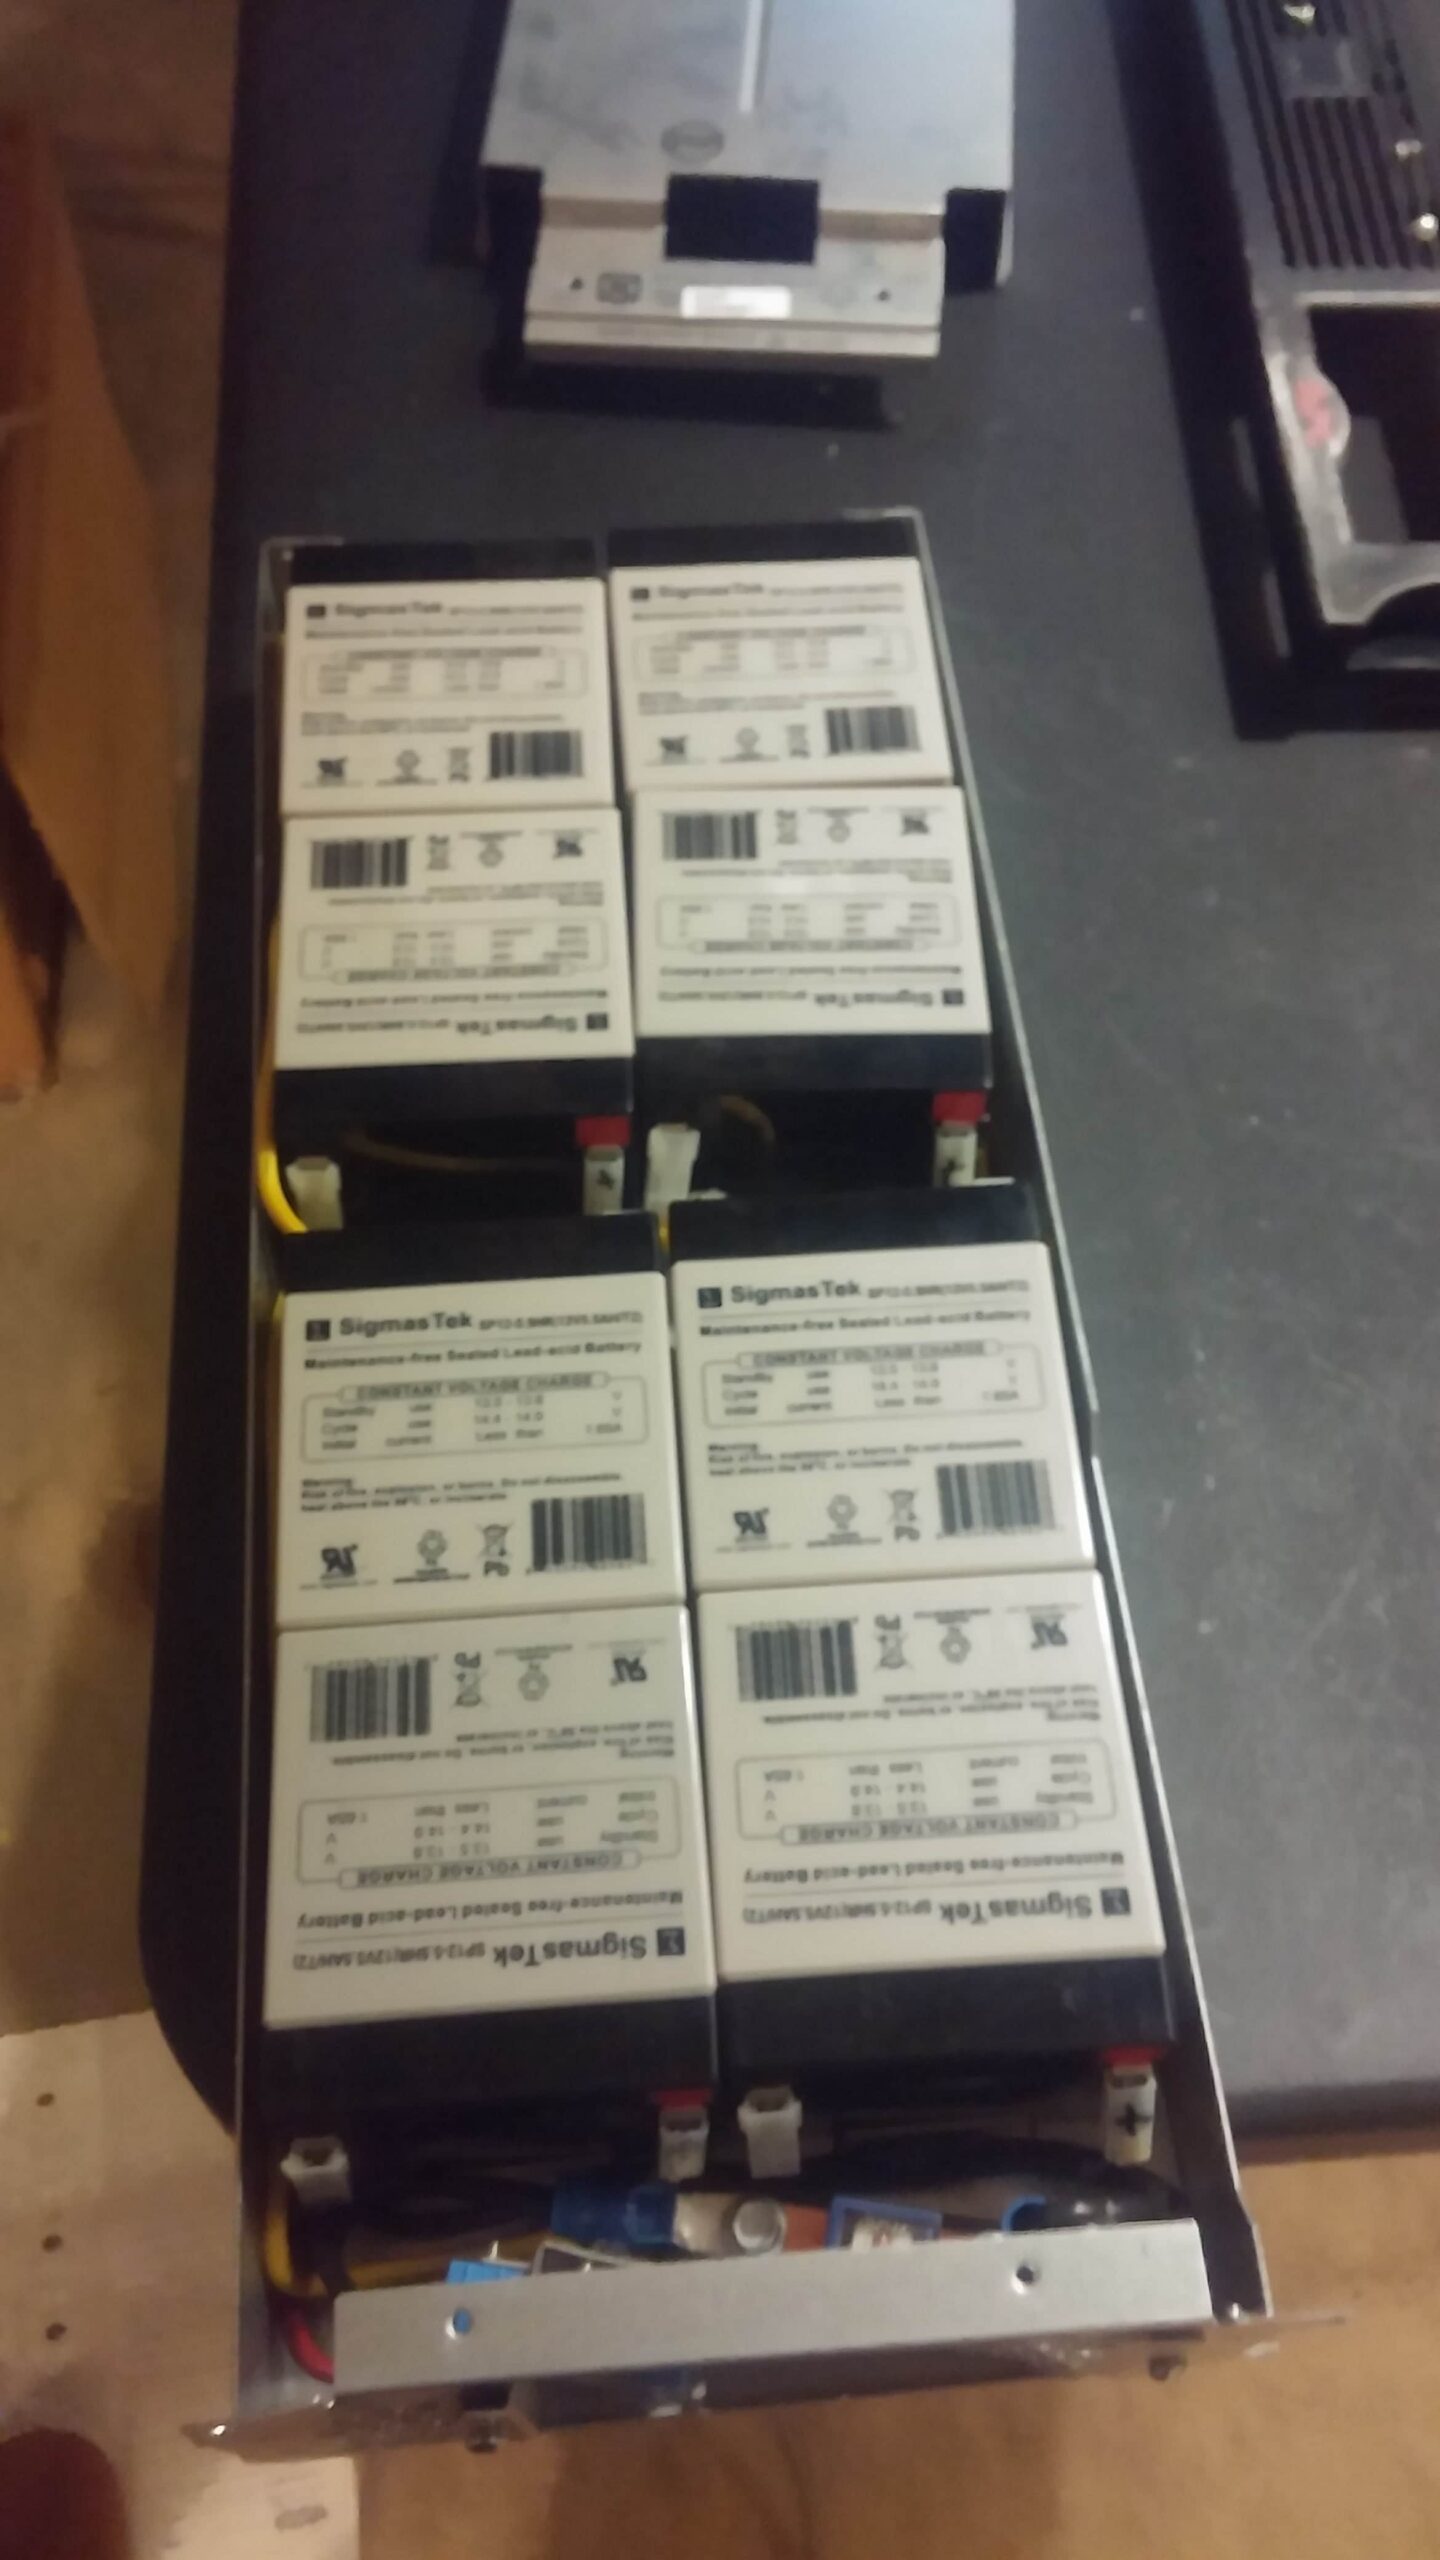
Move on to the next rows, do them one row at a time.
-
Almost done!
-
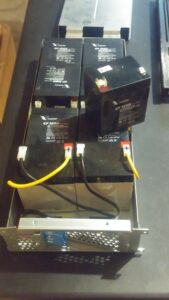
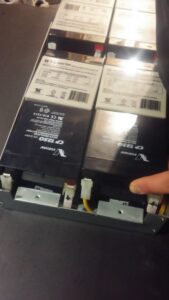
Inspect each row to ensure that the leads haven’t lose and each battery is flat and flush. Put the metal cover tray back on the Battery Cartridge and screw each of the 4 fastener screws.


-
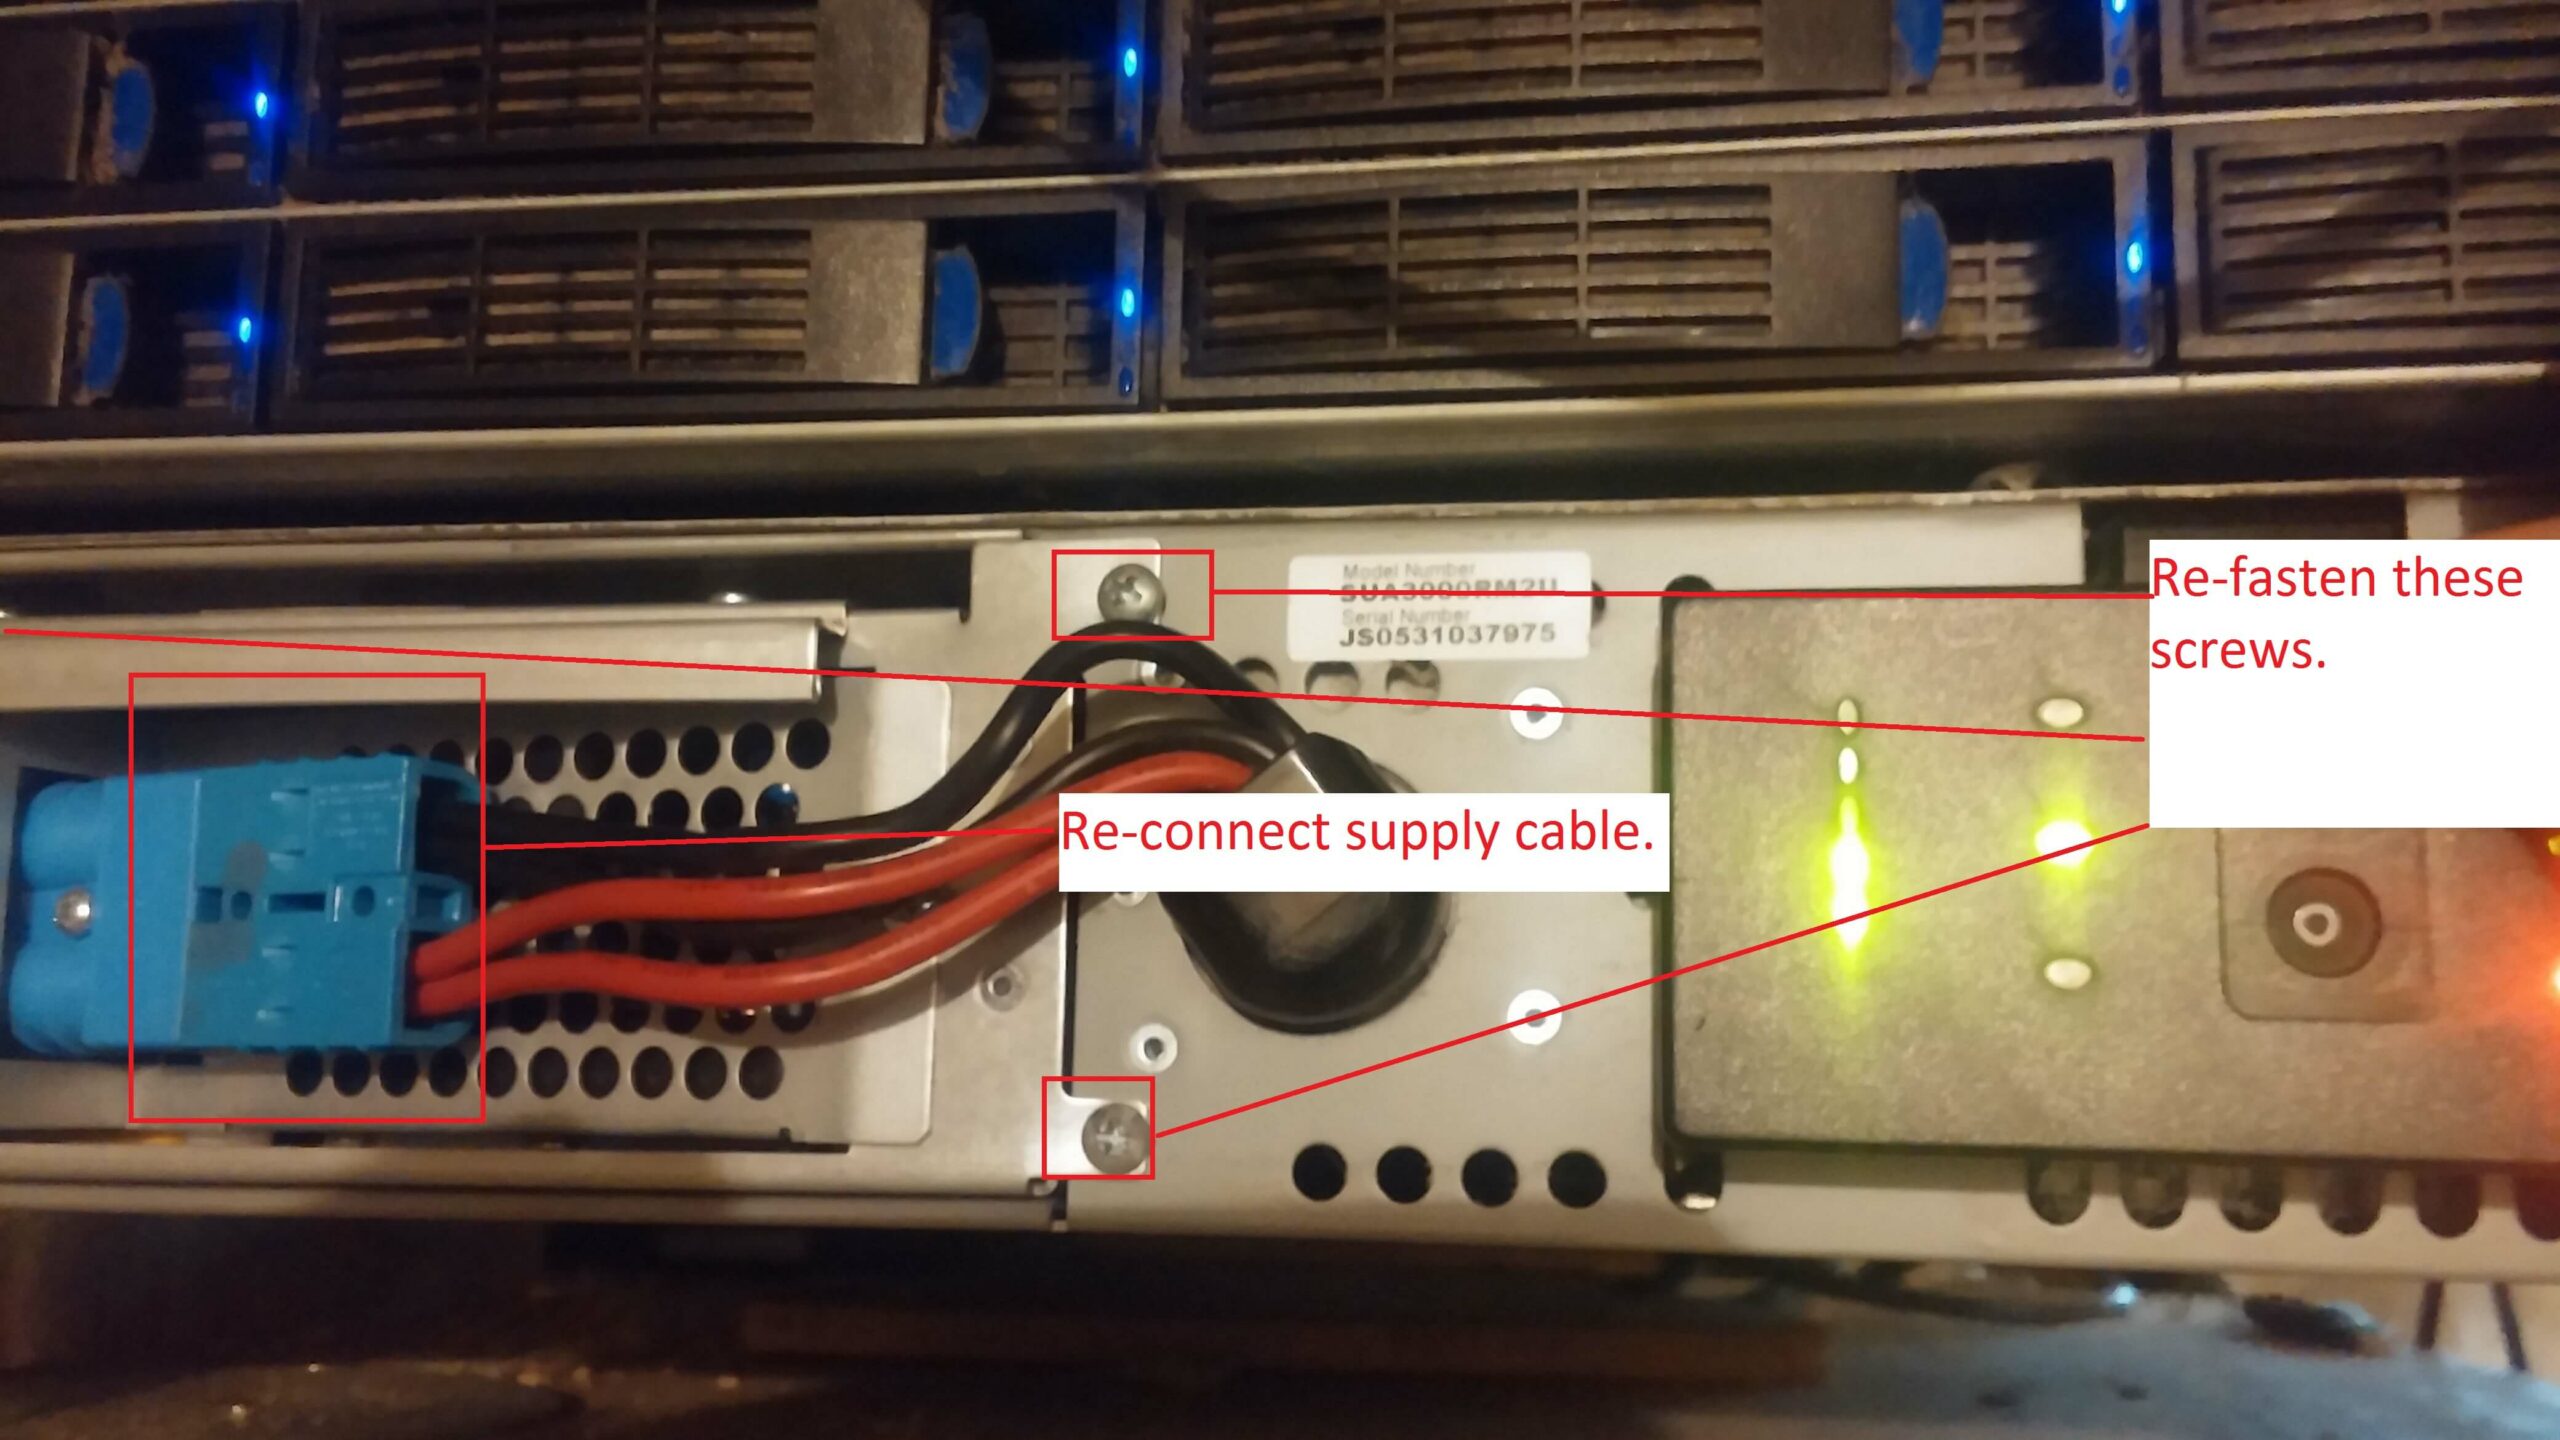
Replace the Battery Cartridge back into the APC unit, Reconnect the Battery Cartridge Power Supply, and Re-Fasten the 3 fastener screws for the Battery Cartridge.

-
Ensure the Replace Battery indicator has stopped blinking and the APC unit has stopped beeping. This will ensure that their is no wiring issues or shorts in the Battery Cartridge.
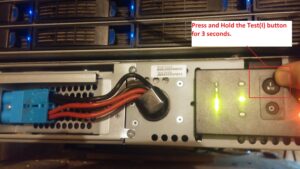
- Press and Hold the Test(I) button for 3 seconds. The unit will kick over to Battery mode and test the new Batteries
-
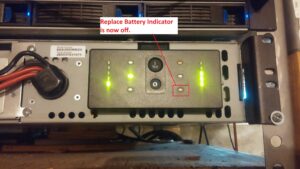
If all goes well, the Replace Battery red indicator should turn off, give the unit a few hours to charge, and you should be all set!! Don’t for get to put the Bezel back on, haha.
-
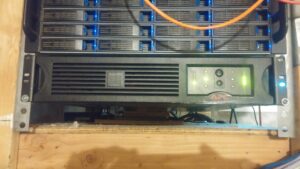
All done!!


Thanks for posting this ! Really useful. Did you perform calibration? I replaced the batteries exactly as you described, but the new set is giving a much lower autonomy, even after 3 days charging.
I did not. According to APC you would need the SmartUPS Management Card and PowerChute software, or to perform a manual calibration you must have 30% load on the UPS and drain the battery until the APC shuts off.
See here, http://www.apc.com/us/en/faqs/FA284198/