VoIP networks, VoIP phones, VoIP extensions, VoIP everything. VoIP seems to be one of those black box buzz words that IT pros toss around, like the “CLOUD!” But what is really going on behind the scenes? How does VoIP protocols actually work? How can I setup a Call System? How do I get an outside number people can use to dial me?
This next series of blog posts (Part1, Part2, Part3) are dedicated to walking through the many aspects related to VoIP(Voice over Internet Protocol) and it’s features.
PART #1 — Laying the foundation for our VoIP network
- The Lab — Our Network pieces.
- SIP — Life blood of VoIP
- FreePBX/Asterisk — Call System Exchange
- Phone Provisioning (Manual/Auto)
- Manual Provisioning with Zoiper, Liphone, UbiPhone
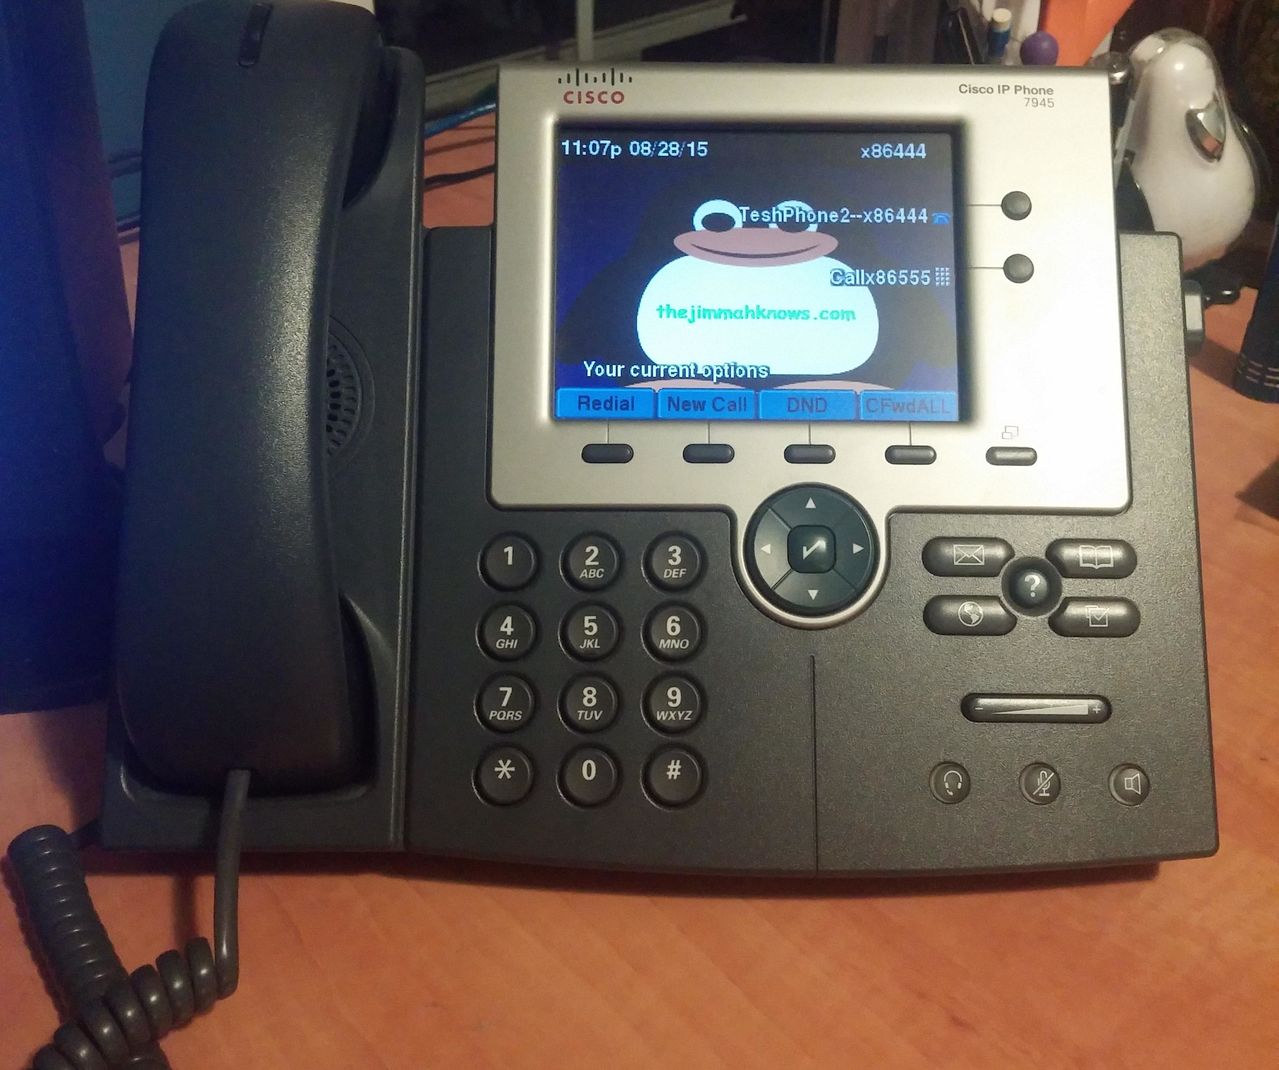
- Auto-provisioning with Cisco 7941G and 7945G (7961G,7965G)
- Making your first VoIP call!
PART #2 — Call routing, Call numbers, SIP Trunks
- VoIP SIP Termination — Where VoIP ends and PSTN begins
- SIP Trunks and DID(external PTSN numbers)
- Outbound and Inbound Call Routing
- Optional: Install g729 codec
PART #3 — Ring Groups, Extension Shortcuts, Call Centers, Voicemails, Secure SIP with TLS, etc
- Ring Groups
- Extension Speed Dialing
- IVR (Interactive Voice Response) — useful for Business Directory Prompt
- Advanced Voicemail Services
- Securing SIP (TLS and SRTP)
- Other Cool Features
Part#1
Our Goal and Network Lab
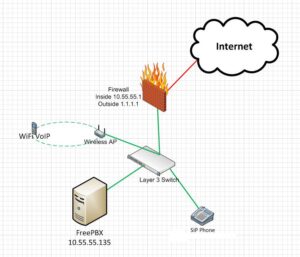
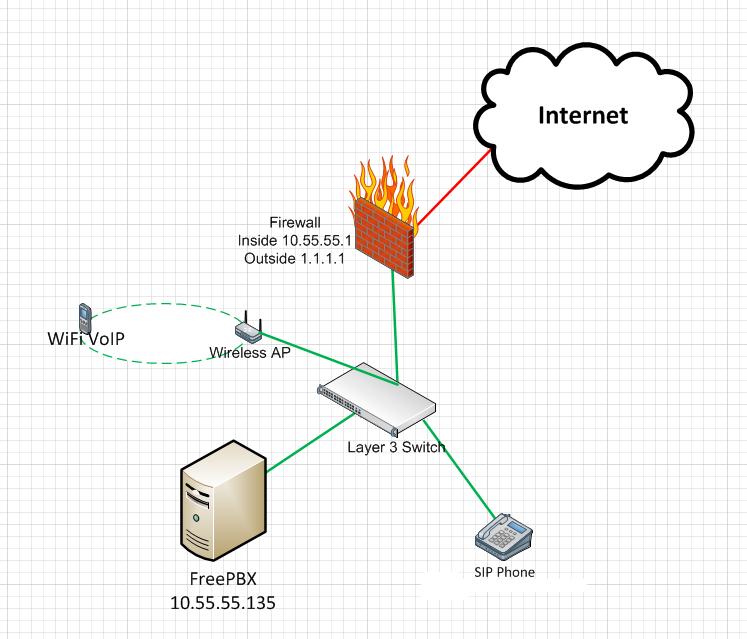
Our goal for this Article is to create a small office VoIP network that consists of the following; A few VoIP phones (both Manual and Auto provisioned) running SIP with an extension schema of our choosing, an outside PTSN line where we can call out of and others can call into, an Interactive Voice Response(IVR) for incoming calls, and other features( secure calling, security banning, hold music, etc). Below is our lab where we will accomplish this.
- Internal VLAN = 10.55.55.0/24, gate 10.55.55.1, nameservers 10.55.55.1
- Our FreePBX box = 10.55.55.135
- Extension Schema x86000 – x86999
- A picture speaks a thousand words
- Please excuse my diagram :-p
- So as you can see, this is a very flat network, however the principals are the same regardless of size. We have separated our Data and Voice networks, just to demonstrate good practice, when in reality it wouldn’t matter for this small of a site. Our WiFi network is just an extension of the Data VLAN (10.55.55.0/24). The only firewall is between our internal VLANs (Data, Voice) and the Internet.
SIP (Session Initiation Protocol)
What is SIP? SIP is the life blood of the VoIP network, our transport protocol. SIP allows us to signal a remote VoIP phone to start the call process, SIP transports the audio/videio payload between VoIP phones to maintain a call session, SIP also handles the registration of our VoIP extensions, and much much more. SIP like most audio/video network transport protocols uses UDP natively to ensure minimal network overhead and reduces bandwidth requirements. SIP relies on a SDP(Session Description Protocol) to negotiate each endpoints capabilities for a call. SIP then relies on RTP(Real-Time Transport Protocol) , SRTP(Secure Real-Time Transport Protocol), or TLS for media stream transmission.
REGISTER sip:192.168.0.1:5060 SIP/2.0
Content-Length: 0
Contact: ;events="message-summary"
Call-ID: 1DBDA84B-37E9-4F05-BE8B-E3A0F6BBEE91@192.168.0.2
Max-Forwards: 70
From: ;tag=220587183498
CSeq: 3 REGISTER
To:
Via: SIP/2.0/UDP 192.168.0.2;rport;branch=z9hG4bK805d2fa50131c9b1434671010000391200000013

SIP/2.0 401 Unauthorized
Via: SIP/2.0/UDP 192.168.0.2;rport;branch=z9hG4bK805d2fa50131c9b1434671010000391200000013;received=192.168.0.2
From: ;tag=220587183498
To: ;tag=as6d76ba1b
Call-ID: 1DBDA84B-37E9-4F05-BE8B-E3A0F6BBEE91@192.168.0.2
CSeq: 3 REGISTER
User-Agent: Asterisk PBX
Allow: INVITE, ACK, CANCEL, OPTIONS, BYE, REFER, SUBSCRIBE, NOTIFY
Contact:
WWW-Authenticate: Digest realm="asterisk", nonce="4f87b95d"
Content-Length: 0

REGISTER sip:192.168.0.1:5060 SIP/2.0
Content-Length: 0
Contact: ;events="message-summary"
Call-ID: 1DBDA84B-37E9-4F05-BE8B-E3A0F6BBEE91@192.168.0.2
Max-Forwards: 70
From: ;tag=2205872822811
CSeq: 4 REGISTER
To:
Via: SIP/2.0/UDP 192.168.0.2;rport;branch=z9hG4bK805d2fa50131c9b14346710100004e6d00000016
Authorization: Digest username="sultan",realm="asterisk",nonce="4f87b95d",uri="sip:192.168.0.1:5060",response="fed6890f44712fbaef17c704e6e30eac"

SIP/2.0 200 OK
Via: SIP/2.0/UDP 192.168.0.2;rport;branch=z9hG4bK805d2fa50131c9b14346710100004e6d00000016;received=192.168.0.2
From: ;tag=2205872822811
To: ;tag=as6d76ba1b
Call-ID: 1DBDA84B-37E9-4F05-BE8B-E3A0F6BBEE91@192.168.0.2
CSeq: 4 REGISTER
User-Agent: Asterisk PBX
Allow: INVITE, ACK, CANCEL, OPTIONS, BYE, REFER, SUBSCRIBE, NOTIFY
Expires: 120
Contact: ;expires=120
Date: Fri, 07 Oct 2005 12:57:55 GMT
Content-Length: 0
**The Excerpt Above is owned by https://who.rocq.inria.fr/Philippe.Sultan/Asterisk/asterisk_sip_external_authentication.html
- The process starts with VoIP phones running the SIP protocol issuing a REGISTER command to register with a PBX (Asterisk).
- The PBX response with a Unauthorized back to the SIP User Agent attempting to register.
- the SIP User Agent submits another REGISTER command, but this time containing the Authorization section.
Authorization: Digest username="sultan",realm="asterisk",nonce="4f87b95d",uri="sip:192.168.0.1:5060",response="fed6890f44712fbaef17c704e6e30eac"
- PBX sends back a OK 200 with what SIP features SIP User Agent is allowed to perform.
Authorization: Digest username="sultan",realm="asterisk",nonce="4f87b95d",uri="sip:192.168.0.1:5060",response="fed6890f44712fbaef17c704e6e30eac"
SIP Request commands: Before we get any further let’s go over the different ones.
- REGISTER = you just read the process above of how a SIP User Agent, such as a VoIP phone registers itself with a PBX (Asterisk). A VoIP phone needs to be registered in order to make and receive calls.
- INVITE = this command is used either directly from SIP User Agents (more on this later) or by the PBX to “invite” SIP clients to a call session.
- ACK = used to Acknowledge INVITE messages and join the call session
- BYE = terminates the connection between users and the call session
- And much more.
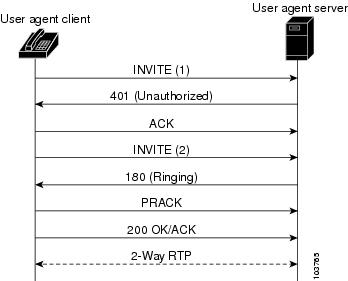
SIP Call Sessions basics: How a call gets setup.
 **Owned by Cisco.com
- Calling phone sends out INVITE
- Called phone receives INVITE and sends an 100 response back “Trying”
- Called phone starts ringing and sends a 180 response “Ringing” back to the Calling phone.
- A 200 “OK” is sent from the Called station once the phone is picked up.
- Calling stations responds with a ACK request
- RTP takes over to handling the audio back and forth “Media Session”.
- A BYE is sent by which ever phone hangs up first.
There is another alternative to SIP called Skinny which is a Cisco proprietary protocol. You will most like find this running as the Signally protocol in a VoIP network which is predominately Cisco. Keep in mind Cisco equipment can run SIP as well. So if your environment/equipment is mixed you will want to go with SIP.
FreePBX/Asterisk — Call System Exchange
FreePBX is a Linux distro that includes Asterisk and a Web Management GUI. Asterisk being the PBX(Private Branch Exchange) software that is used to manage your VoIP logic. A PBX is responsible for your extension numbering plan (x1234), dial plans routing (like when you have to dial *9 to get an outside line), VoIP trunking (merging PBXs together), voicemail boxes, etc. A PBX is also where your VoIP capable phones will register themselves with and receive INVITEs. All in all, just remember the PBX has many features, but it’s primary function is to set up and destroy SIP Call sessions.
Installing…
Let’s get started by installing FreePBX by following the official documentation here(http://wiki.freepbx.org/display/FD/Installing+FreePBX+Official+Distro);
- I chose IPv4 Manual Configuration and set the IP to 10.55.55.135 with a gateway of 10.55.55.1 and DNS to 10.55.55.3+4
- Once the install has completed and you rebooted, go to the Web Admin GUI http://10.55.55.135
- Change the default password to whatever you want.
- Click on FreePBX Administrator
- Run an update by going to Admin –> Module Admin, then click Check Online and at the far right click Upgrade all and Process. (this will only work if you FreePBX server has access to the internet.
Setting up a few extensions…
- Go to Applications –> Extensions
- Select Generic SIP Device and click Submit.
- User Extension = The unique extension , I picked 86555.
- Display Name = The CallerID name that will display on the Called phone when calling from this Extension, TestUser1
- CID Num Alias = This is a masquerade alias that will display when calling from this extension to anyone internally. Used for call centers so the user can’t call you back directly because they are presented with the call centers number. I left this blank.
- Emergency CID = This is the CallerID that will be used when calling outbound routes flagged as Emergency, such as 911 so they will get a number to reach you back at. I left this blank, you will have to set up the logic for this if you want to use it properly.
- Secret = This is the SIP password to be used during the SIP authentication piece. i set it to testpassword123
- NAT Mode = O NAT, this confuses so many people (including myself!) when dealing with SIP. Set this to No, We’ll see why below.
- Link to Default User = Here we can link this extension to a username. This is handy if you want to support Emailing of Voicemail message and the ability of users to log into the Voicemail port to listen to there voicemail’s over the web. I created a new user with Username = testuser123, Password = testpassword123.
- Voicemail = Enable/Disable voicemail on this extension.
- Voicemail password = Number password for voicemail box when dialing from this extension.
- Require from same Extension = whether the Voicemail box is available to reach to check message from anywhere.
- Email Address = Email address to send Voicemail notifications to
- Email Attachment = Attaches Voicemail message as a WAV and sends it to the email address specified.
- Delete Voicemail = Voicemail message will be deleted once it is sent to email address as an attachment.
- Optional Destinations = Here is where you can choose what to do with an incoming call under the following conditions, No Anwser (max rings attempted), Busy (extension is busy), Not reachable (phone is not currently reachable by the PBX to send an INVITE for this call)
- Click Submit.
- Now create a few more extensions, 86444, 86777, and 86888.
Advanced Options:
- Can Reinvite = By default this is set to No, which means the Call session “media session” between two extensions or more is all done through the PBX system. PhoneA talking to PhoneB through the PBX acting like a proxy. When re-invite is set to Yes, after the initial Call session is set up, each phone in the session will try to send a INVITE directly to each other. This is helpful in terms of taking the load off of the PBX, however re-INVITEs get complicated when SIP Call Sessions are not Internal to Internal extensions within the same IP network.
- Qualify = Enabled by default, will send OPTION SIP requests periodically to check that the extension is still available by the device the registered with it. Turning this feature off will help performance, but service will be less resilient to network changes. For instance the PBX only know where the phone is with the extension based on the initial REGISTER request. If this is WiFi phone or LTE…this would not work.
- Transport = UDP, TCP, or TLS for SIP signally (not for the actually audio/video). So for SIP request and responses like REGISTER, AUTH, INVITE, etc. UDP is the best performance but has not security. Use UDP on private and protected networks. TCP is the same just TCP with no security. TLS is just like HTTPS, all SIP signally commands are sent over TLS, meaning you will need a SSL certificate and private key.
- Enable Encryption = This will enable media encryption. Use this in conjunction with TLS transport from above to make SIP signalling and media encrypted. SRTP is the only option. Does not require a certificate as the initial encryption stream is set up in plain text, hence why you need TLS above to blanket this SRTP initiation.
- Deny/Permit IP = Just a little bit more added security. Here you can set what IP ranges devices can be coming from when trying to REGISTER this extension. So like in our lab we know they will be coming from 10.55.55.0/24, we can put Permit 10.55.55.0 255.255.255.0.
To NAT or not to NAT, that is the Question…
SIP NAT’ing. If you recall from the SIP registration messages above you can see in the SIP payload sip:192.168.0.2:5060 SIP/2.0 , so when a call is being setup each phone has been registered with that syntax sip:{address}{port}. Now what happens if my phone is behind a NAT where the real IP address of phone does not match the IP packet that arrives at the PBX server. For example, my phones IP is 192.168.55.5, but my IP packet gets SNAT’d and changed to 1.1.1.10 on it’s way to the PBX server. The IP packet will arrive correctly, but the SIP payload message will contain the line sip:192.168.55.5:5060 SIP/2.0. The PBX will then try to send ACK, and INVITEs for calls to 192.168.55.5:5060 which it cannot get to. SIP breaks. Setting the PBX server up with the NAT mode to yes, tells the server, when this extension registers, ignore IP address in the sip:192.168.55.5:5060 SIP/2.0 message and use the IP Source in the IP packet instead.
Phone Provisioning
There are mostly two types of provision when working with VoIP phones. Manual provisioning and Auto-provisioning. There are pros and cons for each. For example Manual provisioning is easier to get working right away because these phones have a configuration menu on them. I’ve seen most WiFi VoIP phones and VoIP Apps on Smartphones (like UbiPhone or Zoiper or Linphone for apple users) to be this way. You can also find some desktop phones that have manual provisioning, like the Nortel IP1535. On the other side of the coin, Auto-Provisioning is automatic! and best used for larger deployments. It is however a more sophisticated setup. Auto-Provisioning deployments are most common in the business or corporate world where you have many VoIP phones that get their configuration from centralized place upon bootup. These are the Cisco or Avaya phones you may have seen.
Manual Provisioning.
- Start by using your computer/laptop (hopefully with a Microphone, and download MicroSIP which is super easy. I downloaded the Lite version portalable ZIP file.
- Extract it and Run the MicroSIP executable.
- Goto Menu –> Add Account
- Filling in the Following:
- SIP Server = 10.55.55.135 {IP or DNS name of your PBX server}
- User = 86555, or whatever extension you create in the previous steps.
- Domain = local
- Password = password for x86555
- Your name = testuser123
- Transport = UDP

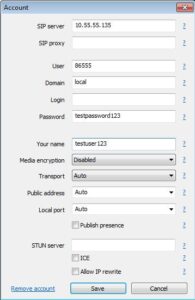
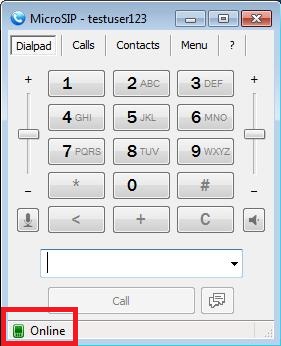
- Click Save and you should see MicroSIP Connecting… and eventually Online.

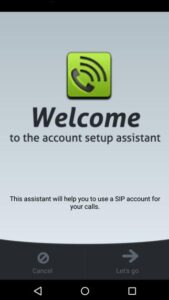
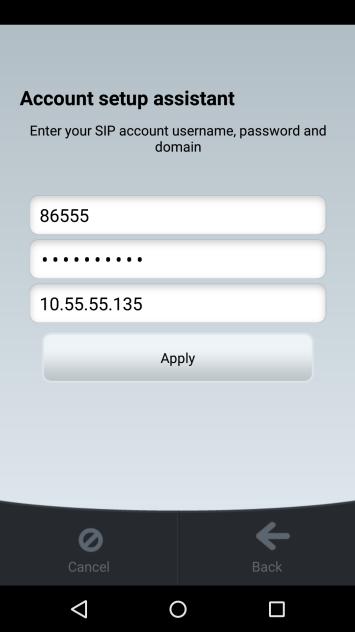
- Now let’s set it up on a Android Smart Phone using UbiPhone
- Once installed open the app.
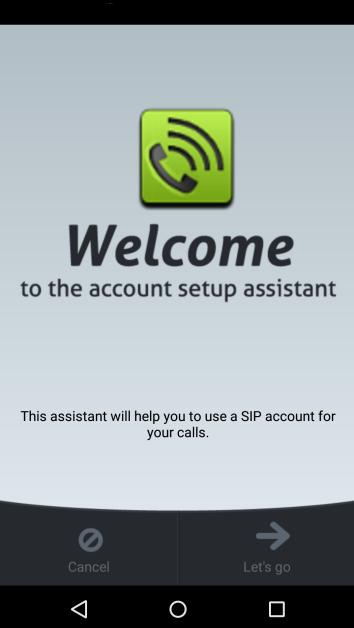
- Click Let’s Go at the Welcome screen

- Select I already have a SIP account

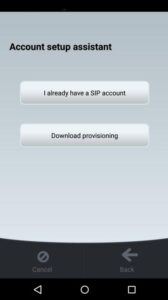
- Type in Extension/User = 86888, password = testpassword123, domain = 10.55.55.135 (your PBX DNS/IP)


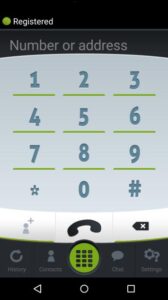
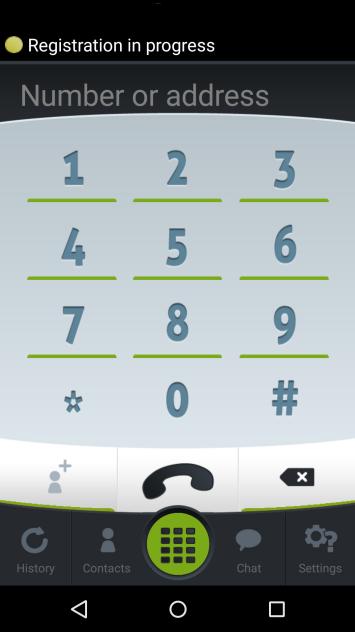
- You’ll see registration in progress, but you need to put in a password. So click on Settings bottom right, Click on the account (86888@10.55.55.135), find the password field and type in the password. Hit Settings button again to back out to main dialer menu.
password

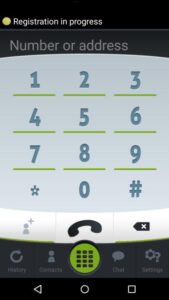
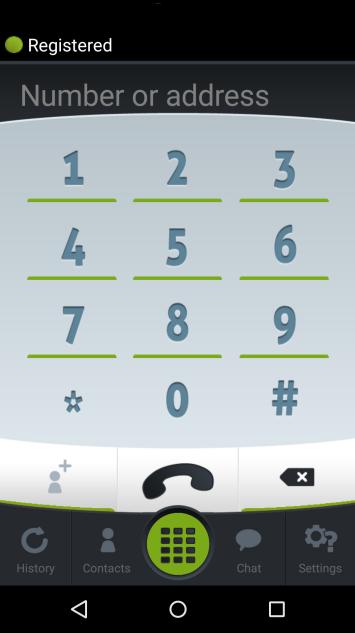
- Registration Successful

- Click Let’s Go at the Welcome screen


Try a Test Call.
x86555 to x86888.
Auto-Provisioning.
So here comes the fun part! Auto-Provisioning of SIP phones! This will be a little more sophisticated than Manual provisioning as more pieces are involved and need to be configured to get it all to work. Each Phone type/brand may also be different. I am going to use two Cisco phones; 1x Cisco 7941G and 1x Cisco 7945G, the G stands for Global not gigabit!.
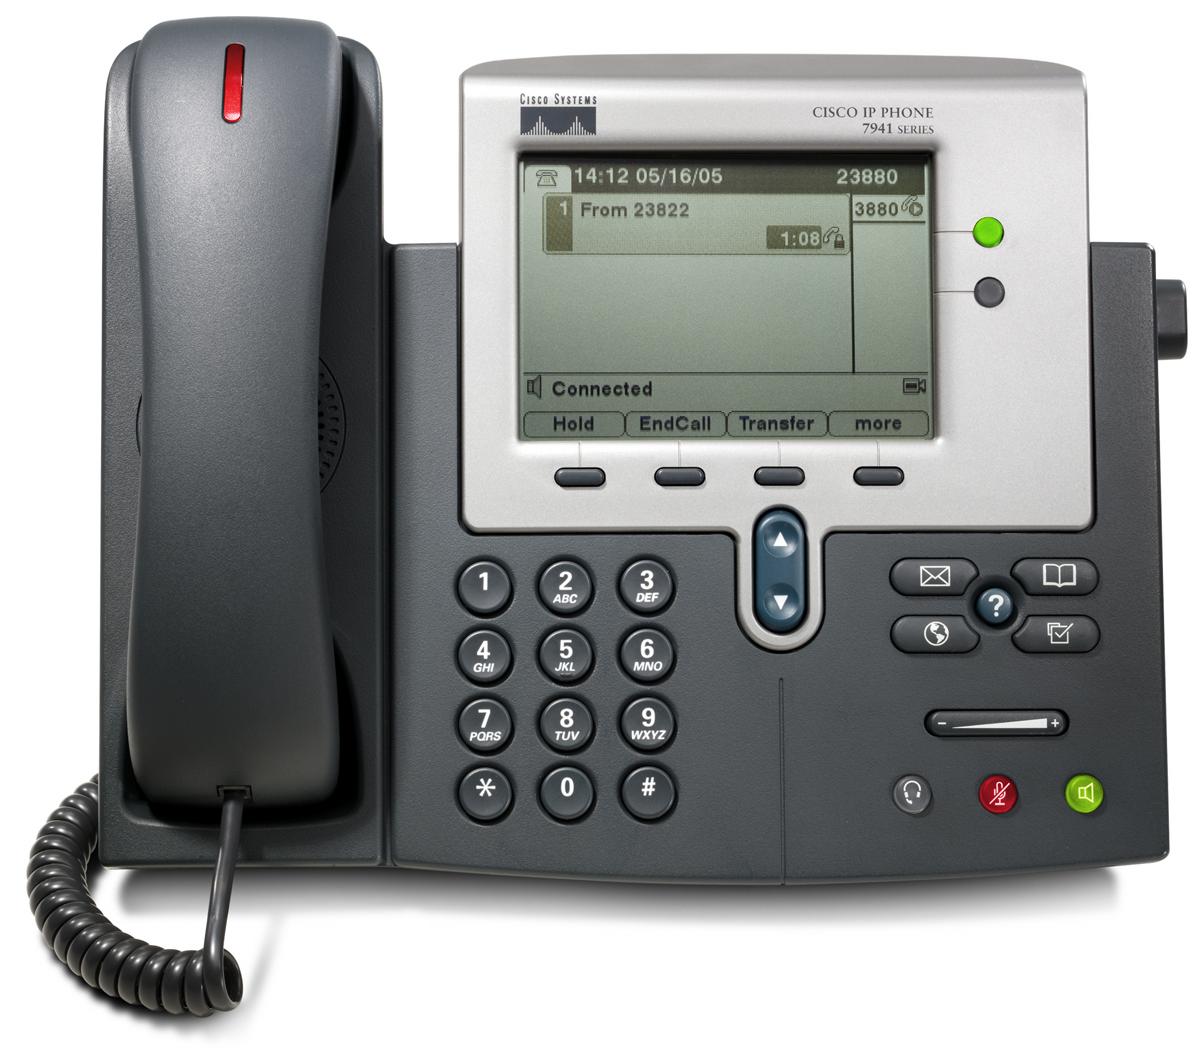

The basic process for auto provisioning Cisco 7940s and 7960s series phones is through DHCP boot options and TFTP server housing the specific config files for the phones.
- Power starts the Phones boot up process
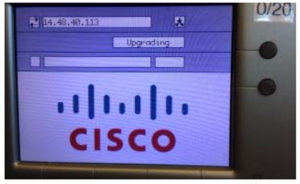
- Phone detects firmware, if no firmware detected goes into Firmware download mode.Normal Booting Screen
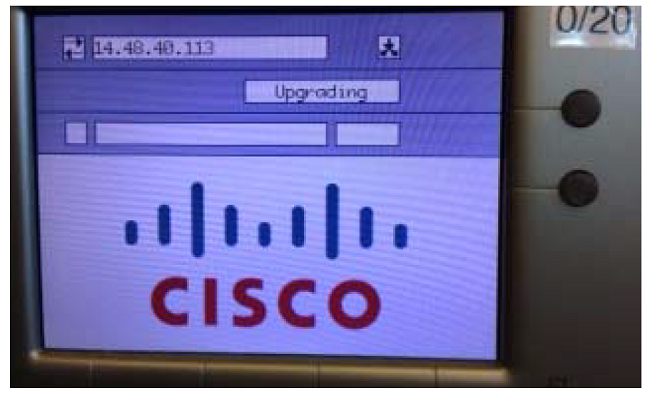
 Firmware Download Mode Screen
- Phone receives IP via DHCP and DHCP option is set telling the phone where the location of the TFTP server is with the config files
- Cisco 7940 and 7960 series phones config file name format is SEP{MAC Address}.cnf.xml, so for example a phone with the MAC address of AAAA.BBBB.CCCC would look for a file named SEPAAAABBBBCCCC.cnf.xml
Excerpt from my TFTP server upon Cisco 7941G boot.
Aug 27 14:29:44 FreePBX xinetd[1108]: START: tftp pid=8382 from=10.55.55.151
Aug 27 14:29:44 FreePBX in.tftpd[8384]: RRQ from 10.55.55.151 filename SEP001C5BBDDCAA.cnf.xml
Aug 27 14:29:56 FreePBX in.tftpd[8385]: RRQ from 10.55.55.151 filename English_United_States/mk-sip.jar
Aug 27 14:30:16 FreePBX in.tftpd[8459]: RRQ from 10.55.55.151 filename dialplan.xml
- As long as the config file has no issues the phone will continue to boot using the configuration items in the file.
Luckily, our FreePBX server by default installs a TFTP service. Located at /tftpboot on the server itself.
Important Files:
- OS79xx.txt = Older series Cisco phones 7940s and 7960s will look for this file to determine what firmware version they should be running, if no match, the phone will go into Firmware Download Mode. This file is not used in SIP, perhaps Skinny?
P0S30202 - XMLDefault.cnf.xml = Global Configuration File used during Firmware Download Mode. The phone will look for its model and grab the firmware version it should be provisioned with.
<Default>
<callManagerGroup>
<members>
<member priority="0">
<callManager>
<ports>
<ethernetPhonePort>2000</ethernetPhonePort>
<mgcpPorts>
<listen>2427</listen>
<keepAlive>2428</keepAlive>
</mgcpPorts>
</ports>
<processNodeName></processNodeName>
</callManager>
</member>
</members>
</callManagerGroup>
<loadInformation115 model="Cisco 7941">SIP41.9-4-2SR1-1S</loadInformation115>
<loadInformation307 model="Cisco 7911">SIP41.9-4-2SR1-1S</loadInformation307>
<loadInformation309 model="Cisco 7941G-GE">SIP41.9-4-2SR1-1S</loadInformation309>
<loadInformation435 model="Cisco 7945">SIP45.9-4-2SR3-1S</loadInformation435>
<loadInformation436 model="Cisco 7965">SIP45.9-4-2SR3-1S</loadInformation436>
<loadInformation437 model="Cisco 7975">SIP75.9-4-2SR3-1S</loadInformation437>
<loadInformation30006 model="IP Phone 7970">SIP70.8-0-3S</loadInformation30006>
<authenticationURL></authenticationURL>
<directoryURL></directoryURL>
<idleURL></idleURL>
<informationURL></informationURL>
<messagesURL></messagesURL>
<servicesURL></servicesURL>
</Default>
- dialplan.xml = Cisco phones use this file to create their dialplans, meaning when you start dialing a number on the phone, how does the phone know hwo long your extensions are? How does it know to signal a outbound call with *9, etc.
<DIALTEMPLATE>
<TEMPLATE MATCH="*97" TIMEOUT="0"/><!-- *97 (*VM for voicemail). Dial immediately -->
<!--<TEMPLATE MATCH="*80,...." TIMEOUT="0" Tone="Bellcore-Stutter"/><!-- *80 (Paging and Intercom followed by Ext#). Dial immediately -->
<TEMPLATE MATCH="...." TIMEOUT="0"/><!-- 4 digits. Wait 1 second, then dial -->
<TEMPLATE MATCH="*#" TIMEOUT="0" REWRITE="%1"/><!-- Dial Immediately After Pressing # -->
<TEMPLATE MATCH="9,1.........." TIMEOUT="0" Tone="Bellcore-Outside" /><!-- call using 860.259.1966 line -->
<TEMPLATE MATCH="9,.........." TIMEOUT="0" Tone="Bellcore-Outside" /><!-- call using 860.259.1966 line -->
<TEMPLATE MATCH="9,27........." TIMEOUT="0" Tone="Bellcore-Outside" /><!-- call using 27-1-500-4700 line -->

<TEMPLATE MATCH="*" TIMEOUT="3"/> <!-- Anything else. Wait 5 seconds, then dial -->
</DIALTEMPLATE>
- ringlist.xml = Configuration file showing where each ring sounds is located. Should be WAV format and placed in root TFTP directory
<CiscoIPPhoneRingList>
<Ring>
<DisplayName>Analog 1</DisplayName>
<FileName>Analog1.raw</FileName>
</Ring>
<Ring>
<DisplayName>Analog 2</DisplayName>
<FileName>Analog2.raw</FileName>
</Ring>
<Ring>
<DisplayName>Are You There</DisplayName>
<FileName>AreYouThere.raw</FileName>
</Ring>
<Ring>
<DisplayName>Bass</DisplayName>
<FileName>Bass.raw</FileName>
</Ring>
<Ring>
<DisplayName>Call Back</DisplayName>
<FileName>CallBack.raw</FileName>
</Ring>
<Ring>
<DisplayName>Chime</DisplayName>
<FileName>Chime.raw</FileName>
</Ring>
<Ring>
<DisplayName>Classic 1</DisplayName>
<FileName>Classic1.raw</FileName>
</Ring>
<Ring>
<DisplayName>Classic 2</DisplayName>
<FileName>Classic2.raw</FileName>
</Ring>
<Ring>
<DisplayName>Clock Shop</DisplayName>
<FileName>ClockShop.raw</FileName>
</Ring>
<Ring>
<DisplayName>Drums 1</DisplayName>
<FileName>Drums1.raw</FileName>
</Ring>
<Ring>
<DisplayName>Drums 2</DisplayName>
<FileName>Drums2.raw</FileName>
</Ring>
<Ring>
<DisplayName>Film Score</DisplayName>
<FileName>FilmScore.raw</FileName>
</Ring>
<Ring>
<DisplayName>Harp Synth</DisplayName>
<FileName>HarpSynth.raw</FileName>
</Ring>
<Ring>
<DisplayName>Jamaica</DisplayName>
<FileName>Jamaica.raw</FileName>
</Ring>
<Ring>
<DisplayName>Koto Effect</DisplayName>
<FileName>KotoEffect.raw</FileName>
</Ring>
<Ring>
<DisplayName>Music Box</DisplayName>
<FileName>MusicBox.raw</FileName>
</Ring>
<Ring>
<DisplayName>Piano 1</DisplayName>
<FileName>Piano1.raw</FileName>
</Ring>
<Ring>
<DisplayName>Piano 2</DisplayName>
<FileName>Piano2.raw</FileName>
</Ring>
<Ring>
<DisplayName>Pop</DisplayName>
<FileName>Pop.raw</FileName>
</Ring>
<Ring>
<DisplayName>Pulse 1</DisplayName>
<FileName>Pulse1.raw</FileName>
</Ring>
<Ring>
<DisplayName>Ring 1</DisplayName>
<FileName>Ring1.raw</FileName>
</Ring>
<Ring>
<DisplayName>Ring 2</DisplayName>
<FileName>Ring2.raw</FileName>
</Ring>
<Ring>
<DisplayName>Ring 3</DisplayName>
<FileName>Ring3.raw</FileName>
</Ring>
<Ring>
<DisplayName>Ring 4</DisplayName>
<FileName>Ring4.raw</FileName>
</Ring>
<Ring>
<DisplayName>Ring 5</DisplayName>
<FileName>Ring5.raw</FileName>
</Ring>
<Ring>
<DisplayName>Ring 6</DisplayName>
<FileName>Ring6.raw</FileName>
</Ring>
<Ring>
<DisplayName>Ring 7</DisplayName>
<FileName>Ring7.raw</FileName>
</Ring>
<Ring>
<DisplayName>Sax 1</DisplayName>
<FileName>Sax1.raw</FileName>
</Ring>
<Ring>
<DisplayName>Sax 2</DisplayName>
<FileName>Sax2.raw</FileName>
</Ring>
<Ring>
<DisplayName>Vibe</DisplayName>
<FileName>Vibe.raw</FileName>
</Ring>
</CiscoIPPhoneRingList>
- menu.xml = Address book or other Service extension
<CiscoIPPhoneMenu>
<Prompt>thejimmahknows Directory</Prompt>
<MenuItem>
<Name>thejimmahknows Directory</Name>
<URL>http://10.55.55.135/directory/directory.xml</URL>
</MenuItem>
</CiscoIPPhoneMenu>
- directory.xml = In XML format like below. Contacts that will show when directory selected on phone.
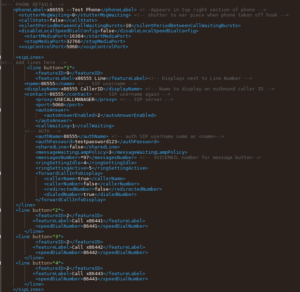
<?xml version="1.0" encoding="UTF-8"?>
<CiscoIPPhoneMenu>
<Title>thejimmahknows Extensions</Title>
<Prompt>Dial</Prompt>
<!--
<MenuItem>
<Name>Jim's Phone</Name>
<URL>Dial:86555</URL>
</MenuItem>
-->
<MenuItem>
<Name>Jim's Office</Name>
<URL>Dial:86444</URL>
</MenuItem>
</CiscoIPPhoneMenu>
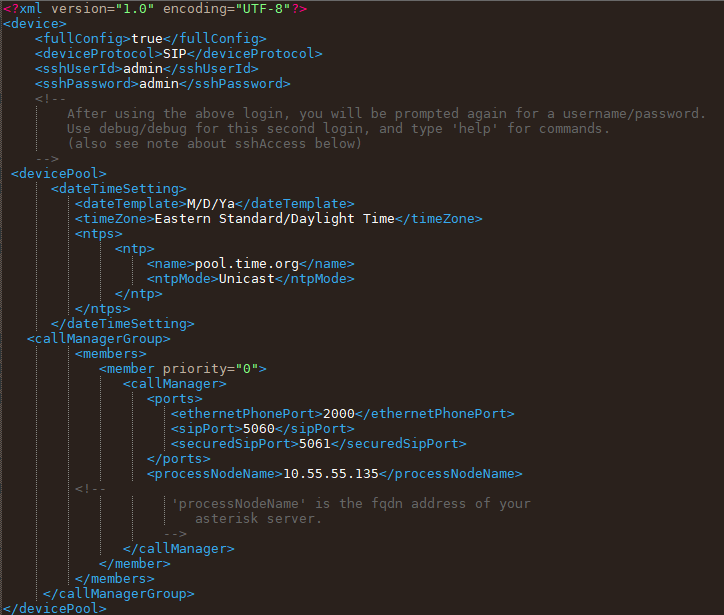
- SEP000011112222.cnf.xml = the main confirutation file for Cisco phone with MAC address 0000.1111.2222.
- Cisco 7941G SEP-7941-example.cfg.txt

- Cisco 7945G SEP-7945-example.cfg.txt
.
- Cisco 7941G SEP-7941-example.cfg.txt

Almost There –DNS and DHCP server time.
The next steps are required so that the Cisco phones will know where the TFTP server is, remember they don’t know anything upon boot and must be told via DHCP Option 150 or 66
- Create a DNS A record to point to your PBX server. I chose sip.local –> 10.55.55.135
- If using Windows create a new DHCP Option 150 with a value type of IP

- Optional: Option 150 should work, however some older phones like DHCP Option 66 (I know this conflicts with PXE!)

- Using Cisco Switch
ip dhcp excluded-address 10.55.55.1 10.55.55.100
!
ip dhcp pool dhcp-pool
 network 10.55.55.0 255.255.255.0
 domain-name local
 dns-server 10.55.55.1
 default-router 10.55.55.1
 option 66 ascii sip.local
 option 150 ip 10.55.55.135
 lease 7
!
!
!
ip domain retry 1
ip domain name local
!
!
ip host sip.local 10.55.55.135
ip dhcp-server 10.55.55.1
- Using your FreePBX server to become the DHCP server for the VLAN, see Red Hat Documentation Install DHCP Server, then follow Red Hat DHCP Option 150 Documentation.
Troubleshooting:
If you’ve made it this far..Congrats!! Now the fun part of figuring out what went wrong. Like in the next Parts I will only be Troubleshooting what we went over.
Checking Asterisk and watching SIP messages
- SSH into your FreePBX box, or whatever Distro you have that is running Asterisk.
- Type asterisk -rvvv to open the asterisk CLI
- This CLI will stdout SIP messages, warnings, and errors. The most common are
NOTICE[24039]: chan_sip.c:28091 handle_request_register: Registration from '<sip:86555@10.22.22.135>' failed for '10.55.55.101:5060' - Wrong password
NOTICE[24127]: chan_sip.c:28091 handle_request_register: Registration from '<sip:86555@10.55.55.135>' failed for '10.55.55.101:59872' - Device not configured to use this transport type
ERROR[24039]: chan_sip.c:16899 register_verify: 'TCP' is not a valid transport for '86555'. we only use 'UDP'! ending call.
The first one denotes authentication failed due to incorrect SIP password for the extension trying to register.
Second one denotes the SIP Client isn’t set up with the correct Transport set for the Extension (UDP,TCP, or TLS).
Check FreePBX configuration for this extension
Third, you can see why the Transport type failed. Only accepts UDP, not TCP for this extension.
Good responses:NOTICE[24039]: chan_sip.c:23571 handle_response_peerpoke: Peer '86444' is now Reachable. (20ms / 2000ms)
Checking Cisco Phones
- If you think your Phone may just be stuck, do a Restart by pressing ‘**#**‘
- Resetting a Phone may help wipe any legacy or old configuration files that may be causing issues. To do this you will need to power cycle the phone and hold down the ‘#’ key until you see the Line Buttons alternate orange back and forth. Cisco Documentation.
- Soft Reset = Press 123456789*0# , this will delete any cached files, like FIrmware and SEP configs
- Hard Reset = Press 3491672850*#, this will reset the phone and format the flash.
- Difference between Restart and Reset, read this.
- Checking the Phones logs (if your phone has an IP address)
- On the Phone go to Settings –> Network Configuration –> IP Address
- Open a browser on a computer that has access to that IP address’s network http://{you-phones-ip}
- Here Click Console Logs and click on the log with the highest increment


- Check the console logs for anything
2056: ERR 03:52:32.266428 JVM: Startup Module Loader|cip.xml.av: - XML Parser Exception: Element '/device/sipProfile/phoneLabel' : String too long: length is 21, max length = 12 (line=95)
2057: ERR 03:52:32.268201 JVM: Startup Module Loader|cip.cfg.h:? - ERROR PARSING CONFIG file:ram/SEP000011112222.cnf.xml
2058: NOT 03:52:32.270845 JVM: Startup Module Loader|cip.cfg.h:? - Config processConfigNoError() result code=CONFIG_FILE_BAD_FORMAT
This shows an error that the phoneLabel parameter is too long
- Check FreePBX Password and Phones SEP.cnf.xml password are the same
Note: I had an issue if I made the password too long. The Cisco 7941s didn’t seem to like it more than 15 characters roughly. - Check your /var/log/messages on your FreePBX box to see if TFTP requests are making it to the server.
Aug 28 22:29:48 sip in.tftpd[4692]: RRQ from 10.55.55.101 filename SIP45.8-5-4S.loads
Aug 28 22:29:51 sip in.tftpd[4693]: RRQ from 10.55.55.101 filename jar45sip.8-5-4TH1-6.sbn
Aug 28 22:30:01 sip in.tftpd[4694]: RRQ from 10.55.55.101 filename cnu45.8-5-4TH1-6.sbn
Aug 28 22:30:06 sip in.tftpd[4703]: RRQ from 10.55.55.101 filename apps45.8-5-4TH1-6.sbn
Aug 28 22:30:19 sip in.tftpd[4704]: RRQ from 10.55.55.101 filename dsp45.8-5-4TH1-6.sbn
Aug 28 22:30:23 sip in.tftpd[4726]: RRQ from 10.55.55.101 filename cvm45sip.8-5-4TH1-6.sbn
Aug 28 22:35:09 sip in.tftpd[4948]: RRQ from 10.55.55.101 filename CTLSEP001E138C7FD7.tlv
Aug 28 22:35:09 sip in.tftpd[4948]: sending NAK (1, File not found) to 10.55.55.101
Aug 28 22:35:10 sip in.tftpd[4949]: RRQ from 10.55.55.101 filename SEP00011112222.cnf.xml
- You may have to do a Packet Capture, check that the Option 150 is being confirmed on the DHCP ACK between the Phone and the DHCP server

Continue to PART#2….
Sources:
- http://brickybox.com/2012/11/25/sep-cnf-xml-for-a-cisco-7975g-with-chan-sccp-b
- http://www.voip-info.org/wiki/view/Asterisk+phone+cisco+79xx
- http://www.voip-info.org/wiki/view/Asterisk+phone+cisco+79×1+xml+configuration+files+for+SIP
- http://www.freepbx.org/download-freepbx
- wiki.freepbx.org/display/FCM/FreePBX+HA-Setting+up+the+Master+and+Slave+Nodes
- http://www.minded.ca/2009-12-16/configure-cisco-ip-phones-with-asterisk/

your article is very good and “up 2 date” with firmwares… my phone is a 7945 i took it last February and it is still unused…[ i think i tried with a bad provider : ippi.fr : i took the free 5 number and used my mobile to phone my home but it fails…so i ll register elsewhere , may be callwithus that has a lot of infos for phones and redo test ]
i tried to use asterisk but it is very complex , too many modules.., have you tried xivo ?
the web interface is clean , they made module for cisco 7945 and others but they use firmware 8.54 and my phone refuses to load this old firmware…
with your article , i ll try again asterisk if i fail with xivo .
i tried to use your file parameters , one thing puzzled me : with the 7945 , you say the ip for 127.0.0.1 , but i do not think you install aterisk in the phone….so you use that ip because of the vlan ?
beside the vlan , both pc and 7945 are having their own ip , the pc is connected to the second port of the 7945 and have the asterisk server . no ?
if i think right , that ip difference in the configs you show between the 7945 and 7941 is the result of the lan connection and the use of vlan . i mean you could have made a similar xml as with the 7941 using real ip …
what could be cool is that you wrote a config for standalone 7945 …will you do that soon ?
thank you again for the article , i hope you will make it even better
Hi jc geny,
I have not tried Xivo, I started with Elasix but moved to AsteriskNOW since I wanted to get a PBX up and running quickly. There are many articles on how to build from source making the PBX less bulky. I’ve disabled most of the modules in Asterisk and find it runs very stable.
Regarding your input on the Cisco 7945 as standalone, correct, my article is showing the configuration for a lightweight or boot from LAN setup. Cisco 7945 phones will save their first boot config file in flash, so you can load the config via TFTP that points to callwithus PBX system, which is what it sounds like you are going forward with. I’ve used http://www.voip-info.org to do much of my research, try http://www.voip-info.org/wiki/view/Standalone+Cisco+7945/7965 and good luck!
i made a topic at elastix forum and posted there my config files for my 7945…
they are different from yours and are working well with elastix 2.5 ou the ippi.com provider that gives a sip and a terrestrial line phone numbers so phone can be called..
http://forum.elastix.org/viewtopic.php?f=84&t=131636&mobile=mobile
the topic is in french…
have a nice time reading it